Lead Time Filter Properties Panel
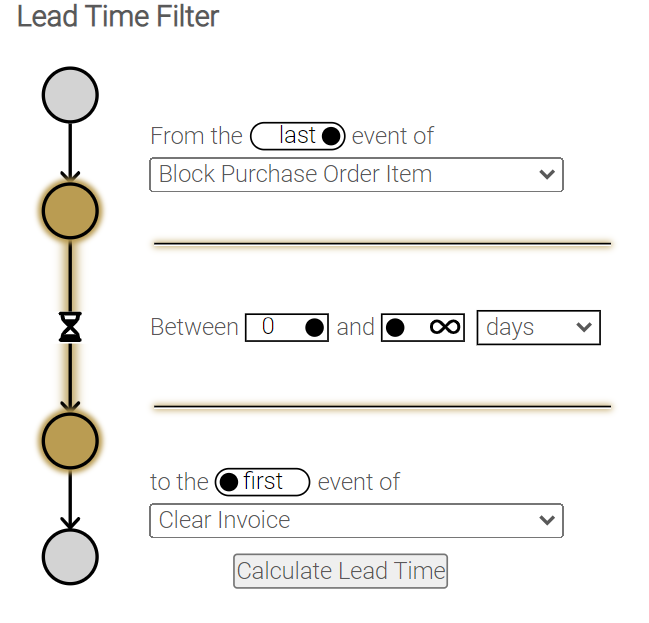
The Lead Time Filter helps you define a subprocess to see its lead time.
Lead time (also sometimes called throughput time) refers to the total time it takes for a process to be completed from start to finish. It can also be applied to a subprocess or a process step.

Dimensions
For the first dimension, set the process steps.
- Use the fields
ActivityTypeor theActivityType\_$(mvSelectedLanguage)to switch between languages.
Data
-
Set the field on which to filter, normally this will be the
CaseID -
Set the fields between which the interval will be calculated, normally this will be the
ActivityStartTimestampandActivityEndTimestamp
Variables
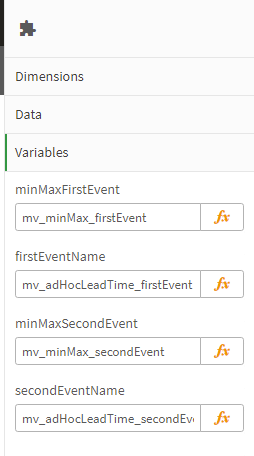
Here the variables in which the ad hoc lead time configuration is written are set to be able to calculate different measures in mpmX.
-
minMaxFirstEvent: set a variable to store the information if the first occurrence or the last occurrence of the first dimension value (normally a activity) should be taken into account
-
firstEventName: set a variable where the first dimension value is stored (normally a activity)
-
minMaxSecondEvent: first set a variable to store the information if the first occurrence or the last occurrence of the second dimension value (normally an activity) should be taken into account
-
secondEventName: set a variable where the second dimension value is stored (normally an activity)

Appearance - General
-
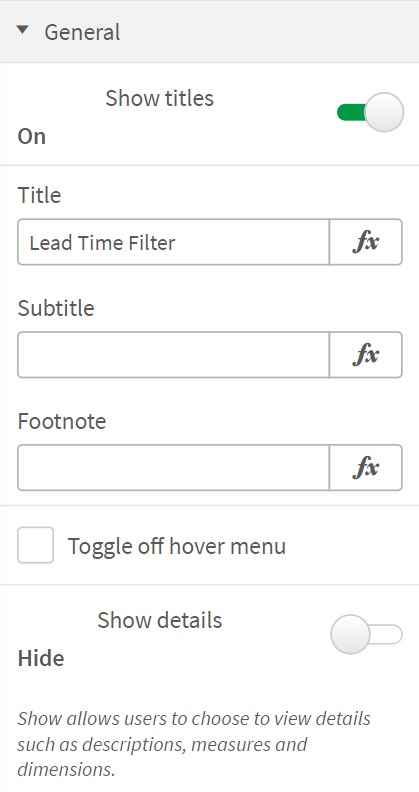
Show titles: Switch the button to "on" in order to display the title
-
Title: Set the title of the Lead Time Filter
-
Subtitle: Set a subtitle for the Lead Time Filter
-
Footnote: Set a Footnote for the Lead Time Filter
-
Toggle off hover menu: Check this checkbox if you want don't want the "more" and "full screen" icons to appear when hovering over the extension
-
Show details: Switch button to "on" in order to display detailed information such as measures and dimensions

Appearance - Alternate states and colors
-
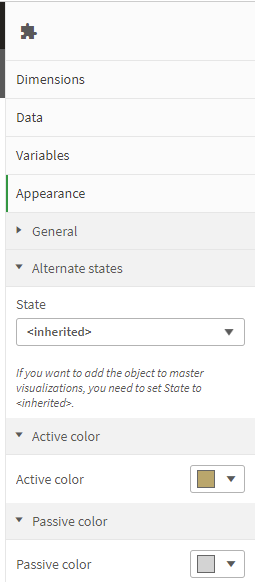
Alternate States: "State": Set the state to "inherited" if you want to add the object to master visualizations
-
Active Color: Choose the node color for events in the time calculations
-
Passive Color: Choose the node color for events outside the time calculation
