Create a Guided Tour
The Guided Tour is predefined as a standard feature for the template application, but must be released for you as an additional module.
Please contact your responsible account manager for more detailed enquiries.
The Guided Tour is used to describe certain objects on the worksheet in order to make it as easy as possible for end users to operate the tool. A speech bubble with a text points to the relevant object, while the rest of the worksheet fades into the background:
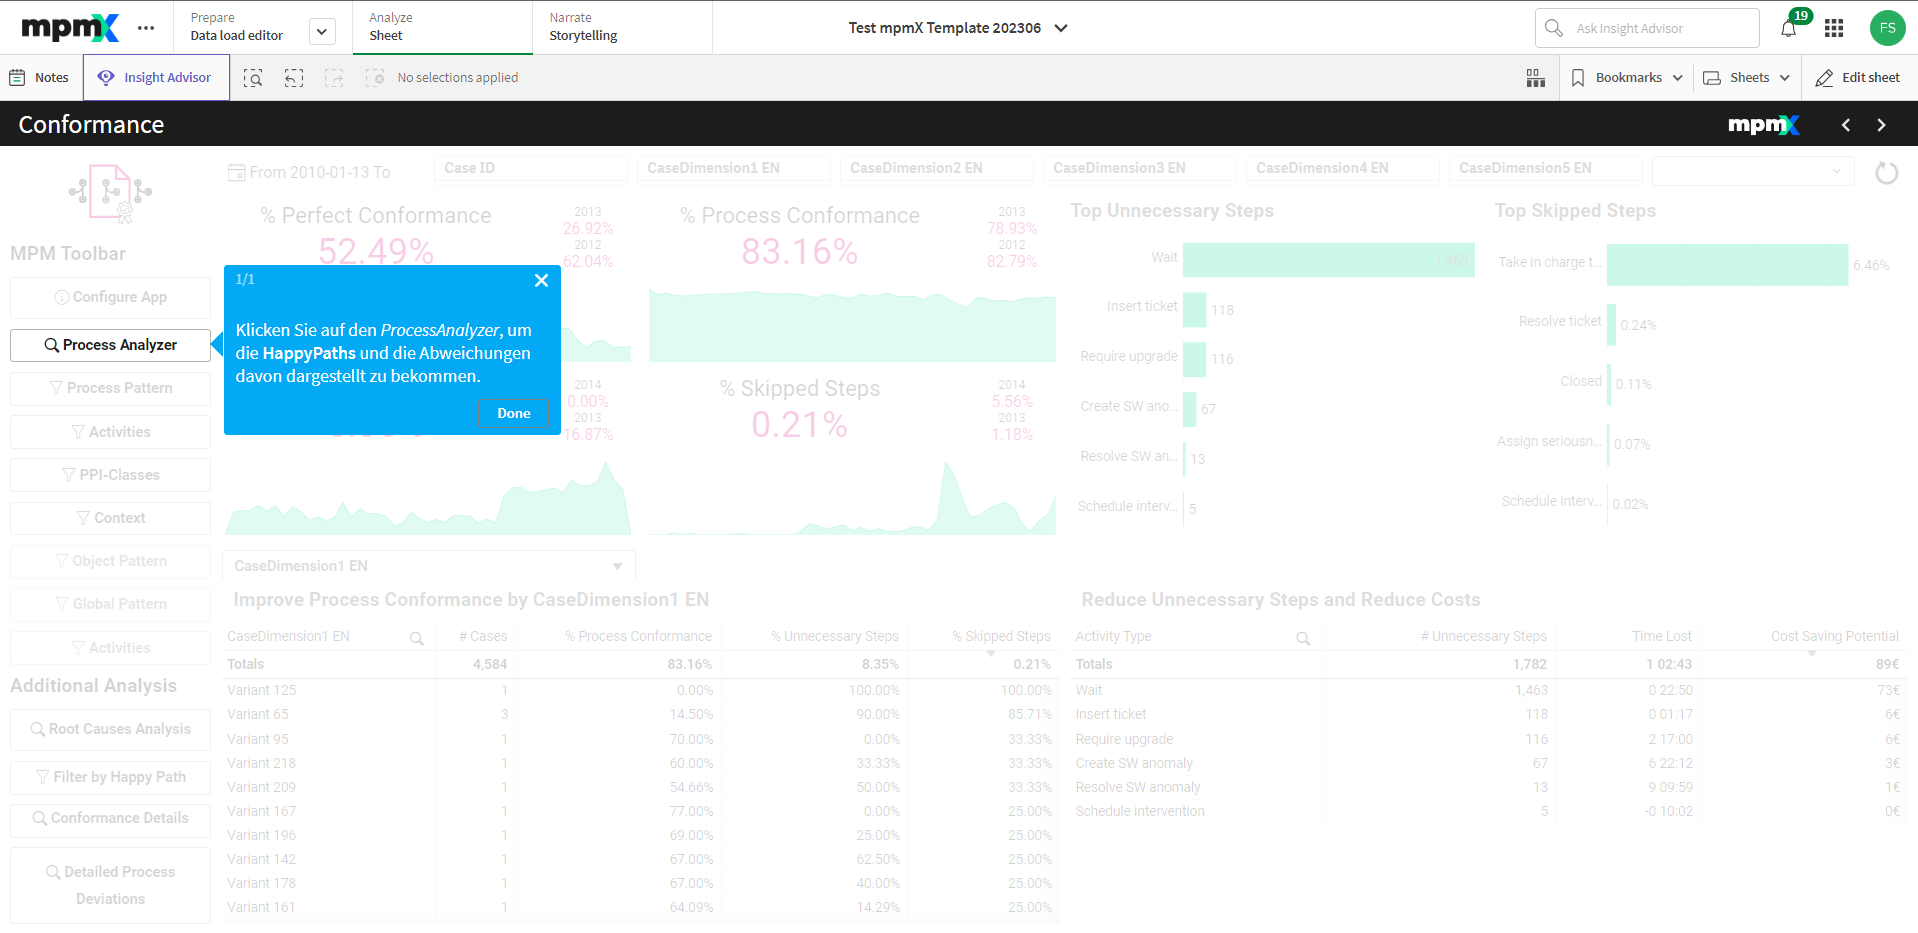
Guided Tour Editor
-
Tour Settings: You can choose between four different modes for starting the tour:
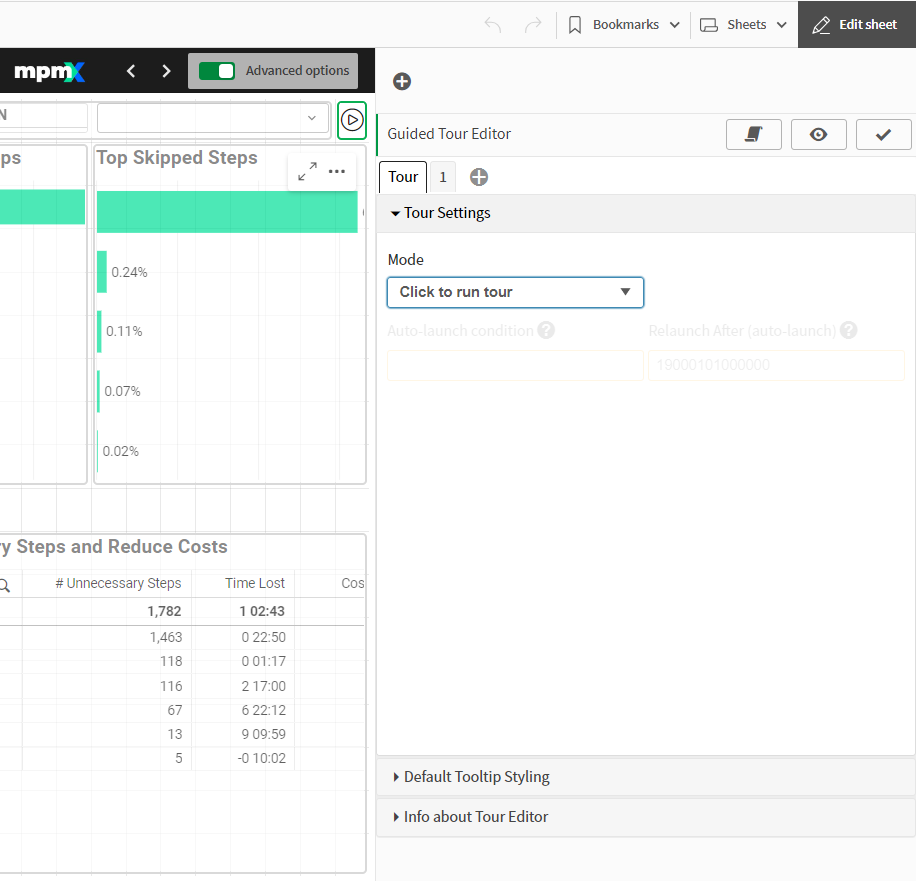
Guide Tour Different Modes -
Default Tooltip Styling: Further display parameters for the speech bubbles can be defined:
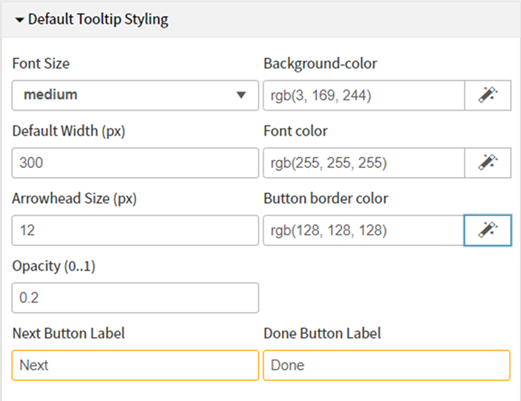
Guided Tour Styling -
Tooltip Options: Select any object on the worksheet that you want to describe:
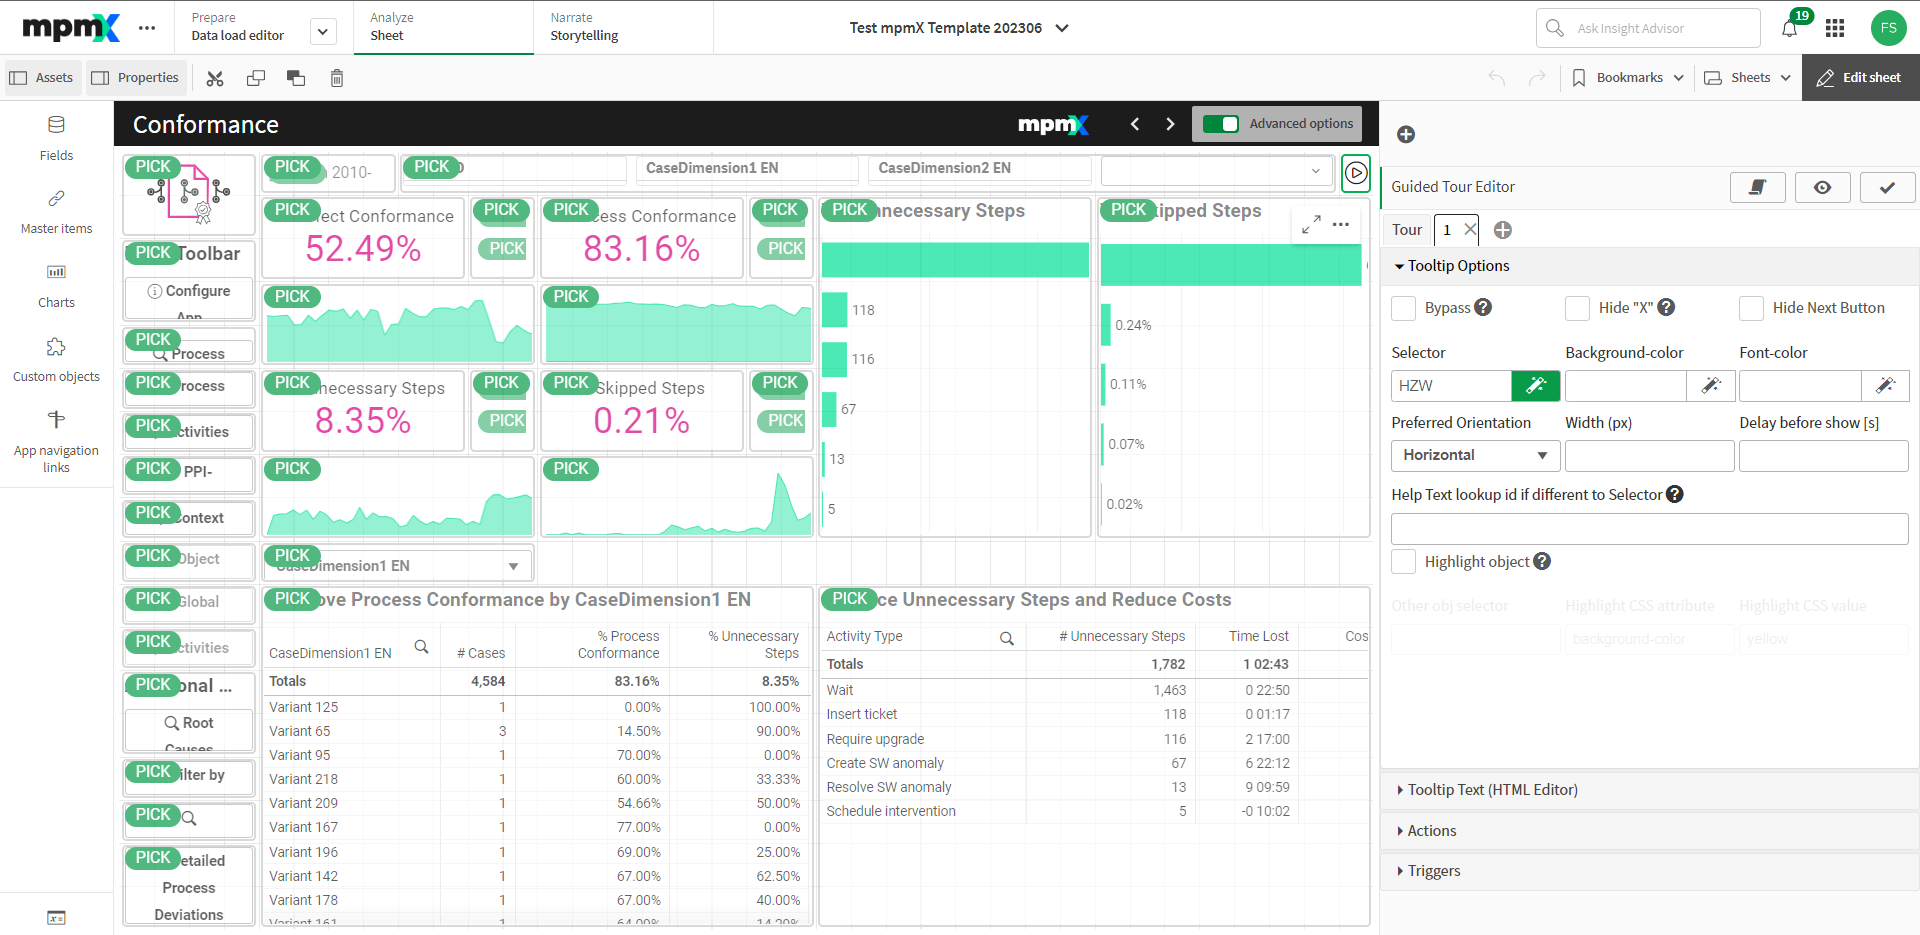
Guided Tour Object Picker -
Tooltip Text (HTML Editor): Text (& images) can now be entered:
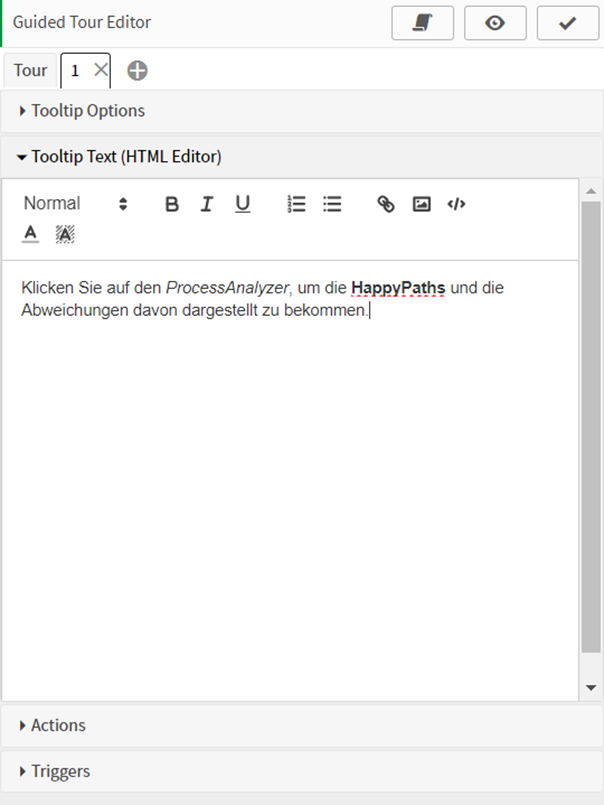
Guided Tour HTML Editor -
Actions: In addition, various actions could now also be performed automatically, such as deleting a filter when this speech bubble is closed:
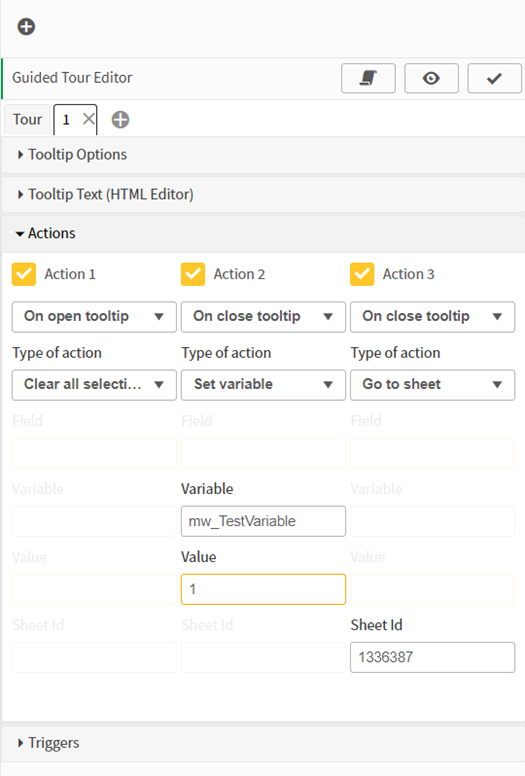
Expert Configuration -
Triggers: Triggers can also be defined for when a speech bubble should appear automatically, e.g. when selecting a CaseID:
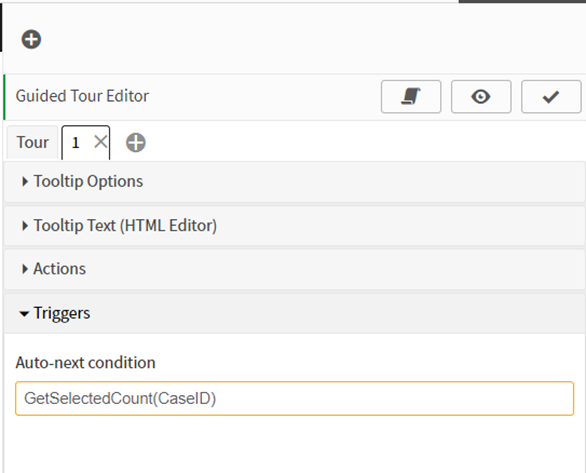
Expert Configuration 2
These steps can now be repeated for any number of objects.