OCPM Example
You can use an Object-Centric Process Mining (OCPM) event log in any of the various options in the Import Wizard - e.g. Upload from Client, Load from Server, or Load from Database.
To get started, basically follow the same instructions as are found in their variants on Tab 1 - App set-up & File Upload tab.
In this example we used the Load from Database with a P2P OCPM event log.
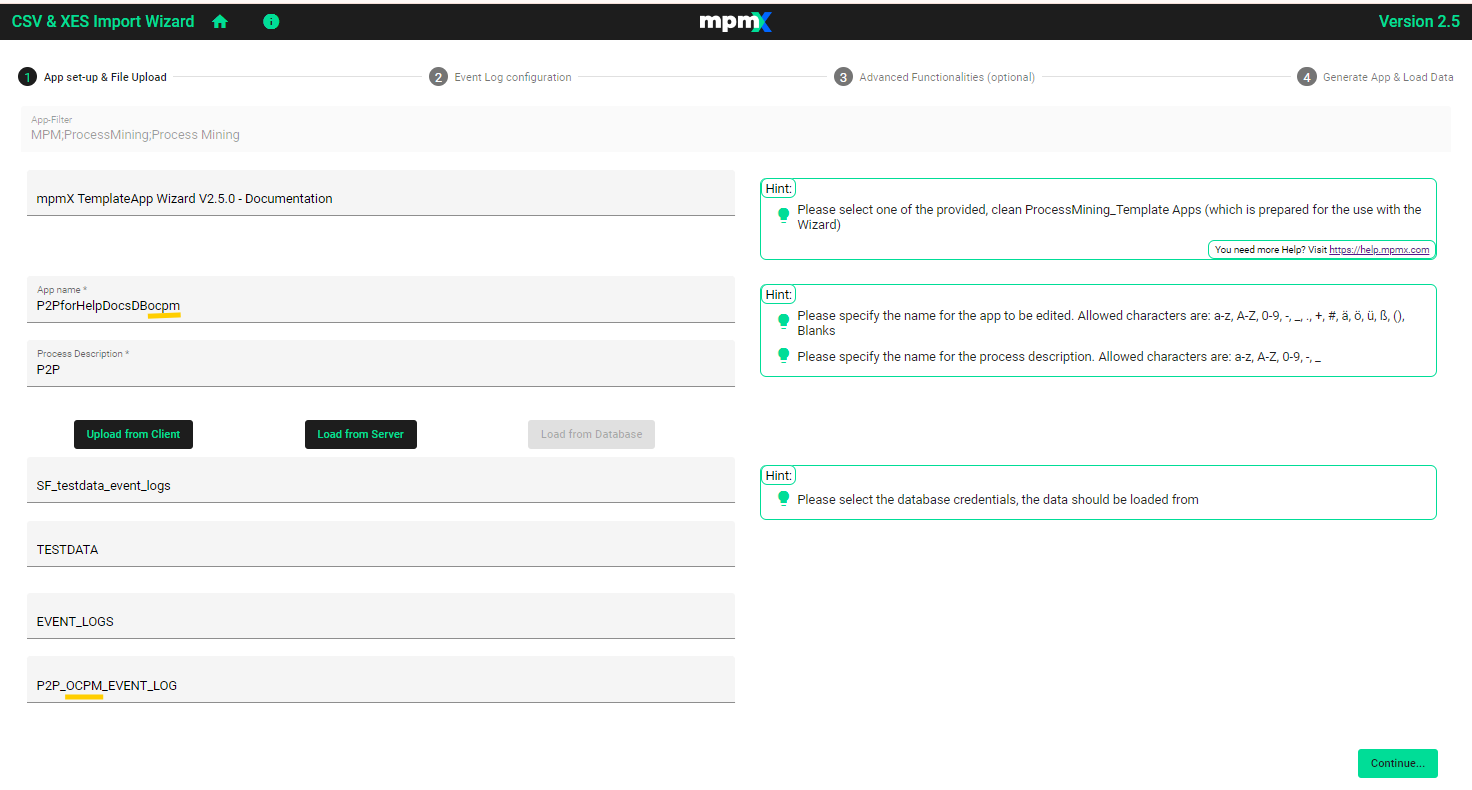
Click "Continue" to go on to the next tab.
Tab 2 - Event Log Configuration
The key difference comes on the second tab.
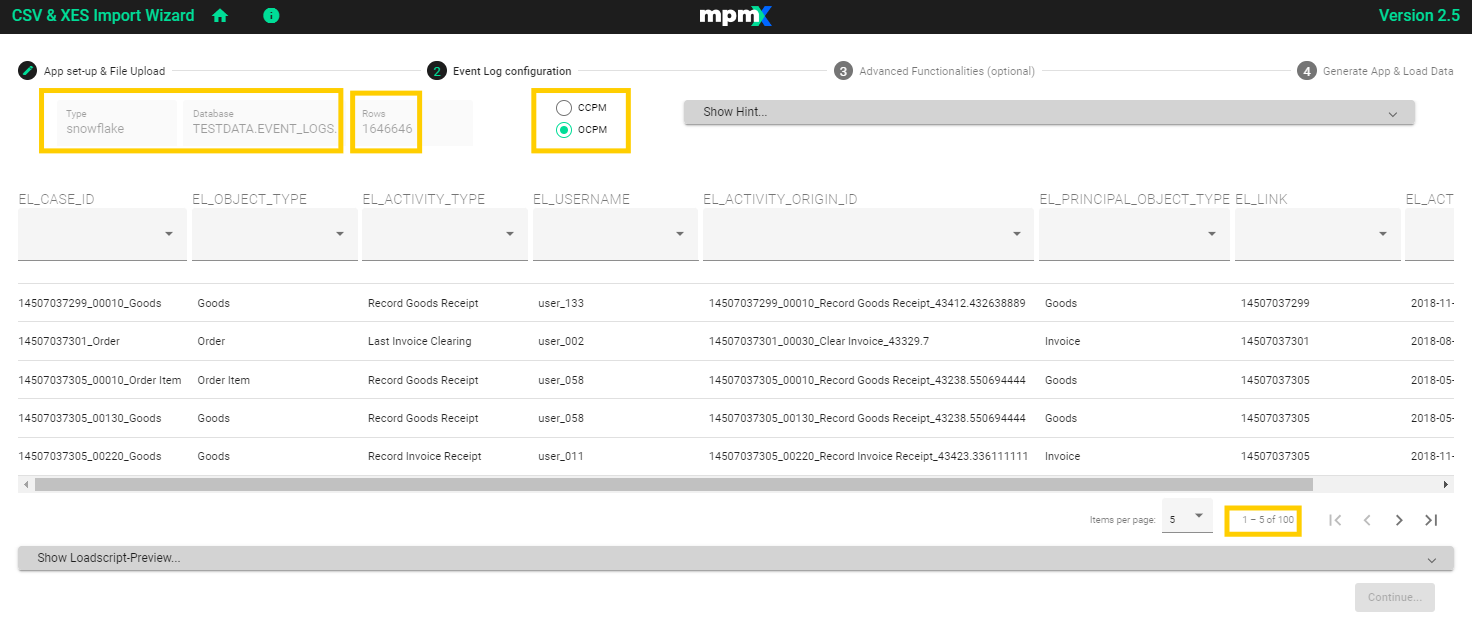
When you first land on this page the default screen will show the two radio buttons in the top-center of the screen for Case-Centric Process Mining (CCPM) and Object-Centric Process Mining (OCPM).
- Check if the wizard has already recognized the process as an OCPM process and selected the correct radio button.
- In v2.5 we do not validate the configuration related to the mining algorithm selection (CCPM vs OCPM)
- If not, then select OCPM.
If an OCPM event log is used, but the radio button here has CCPM selected, then the result will be a CCPM model.
Since this example used "Load from database", the top of the screen shows the confirmation of the Database type, name, schema, etc. and the total number of rows in the table, as compared to the 100 showing in this preview page. If uploaded from a client or a server, the screen will match those standard options.
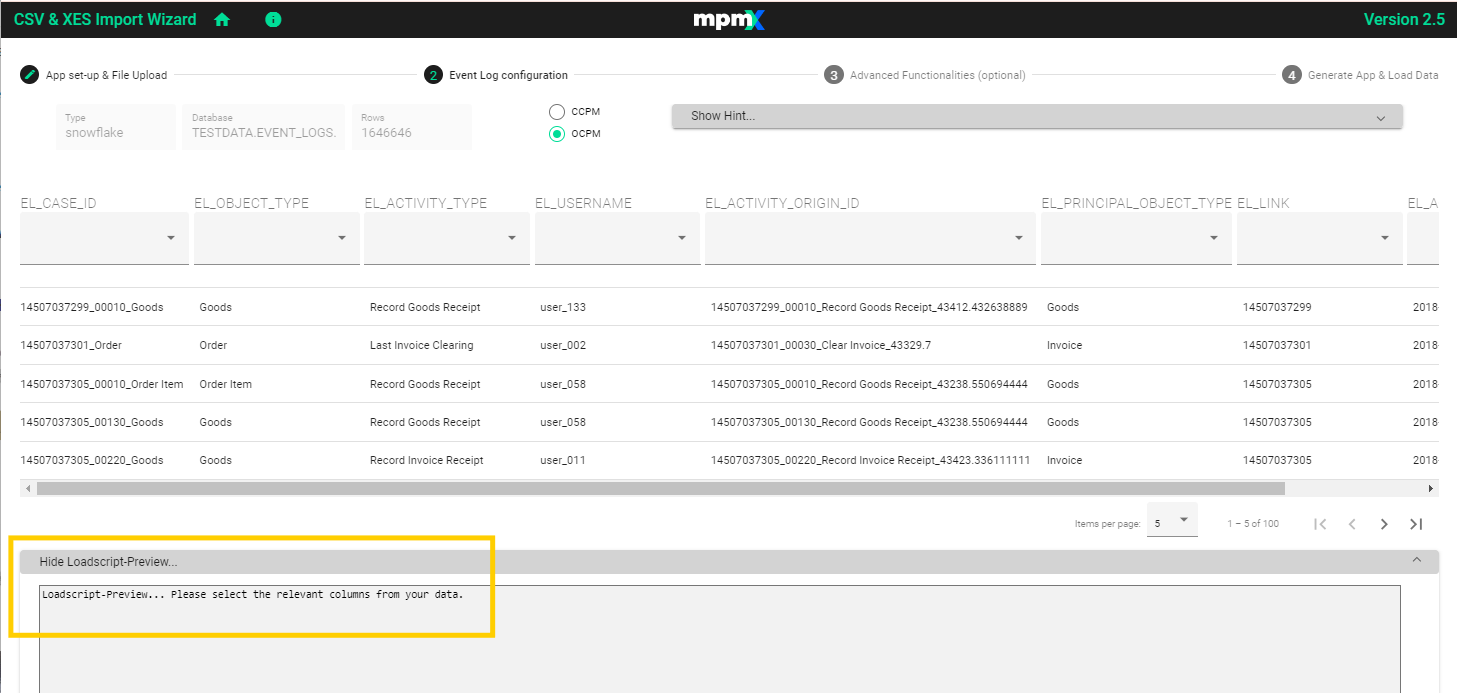
At this point, before doing anything, if you expand the Loadscript Preview section at the bottom of the page it will have nothing to show. You need to first map your columns.
If the event log columns already used the same field names as the mpmX Template App, then they would be automatically assigned.
Map the Required & Optional Fields
Use the dropdown options to select the mpmX standard field names and match them to your own data.
The names of the columns reflect the data in your event log and so will vary in name and order when using different event logs.
Three fields are required for any process mining app, as mentioned in the Hint:
- ActivityType
- CaseID
- either ActivityStartAndEndTimestamp or the two individual start and end timestamps.
As you map the fields, you see the changes showing up in the Loadscript below.
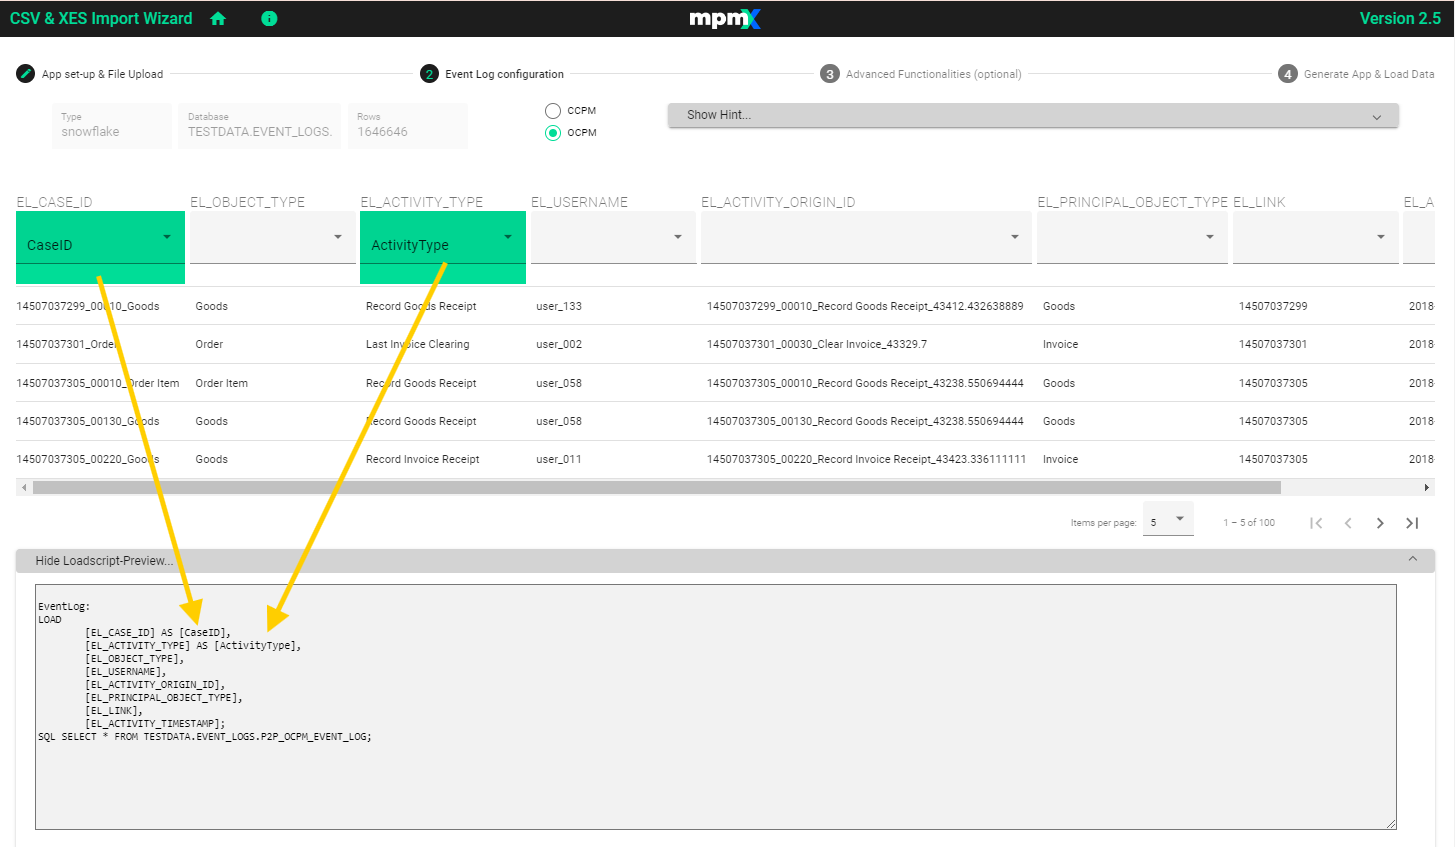
OCPM processes require four more fields to be mapped:
- ObjectType (OCPM)
- PrincipalObjectType (OCPM)
- ActivityOriginID (OCPM)
- Link (OCPM)
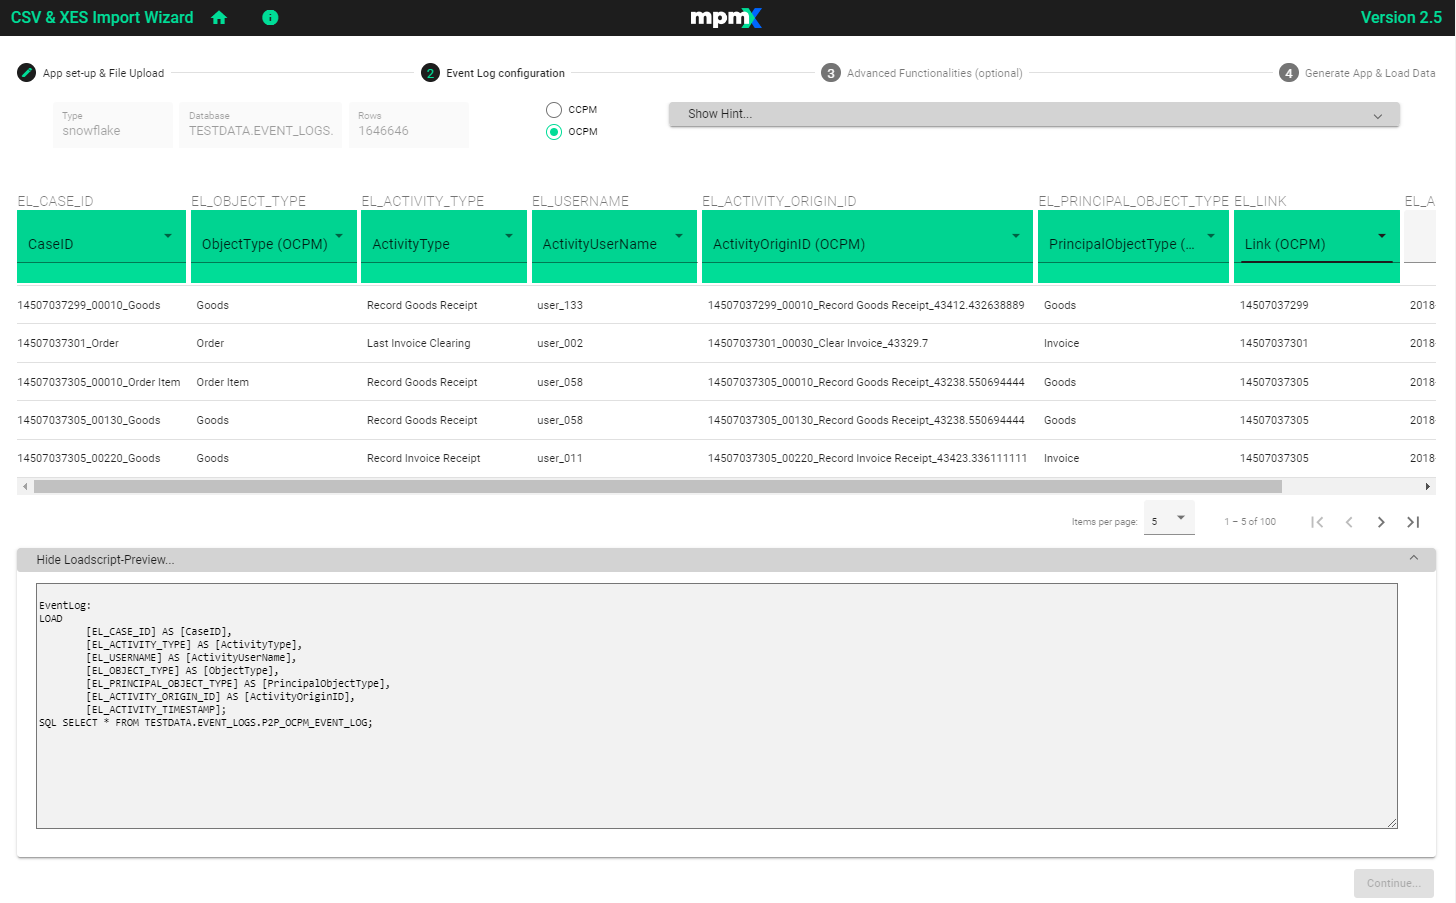
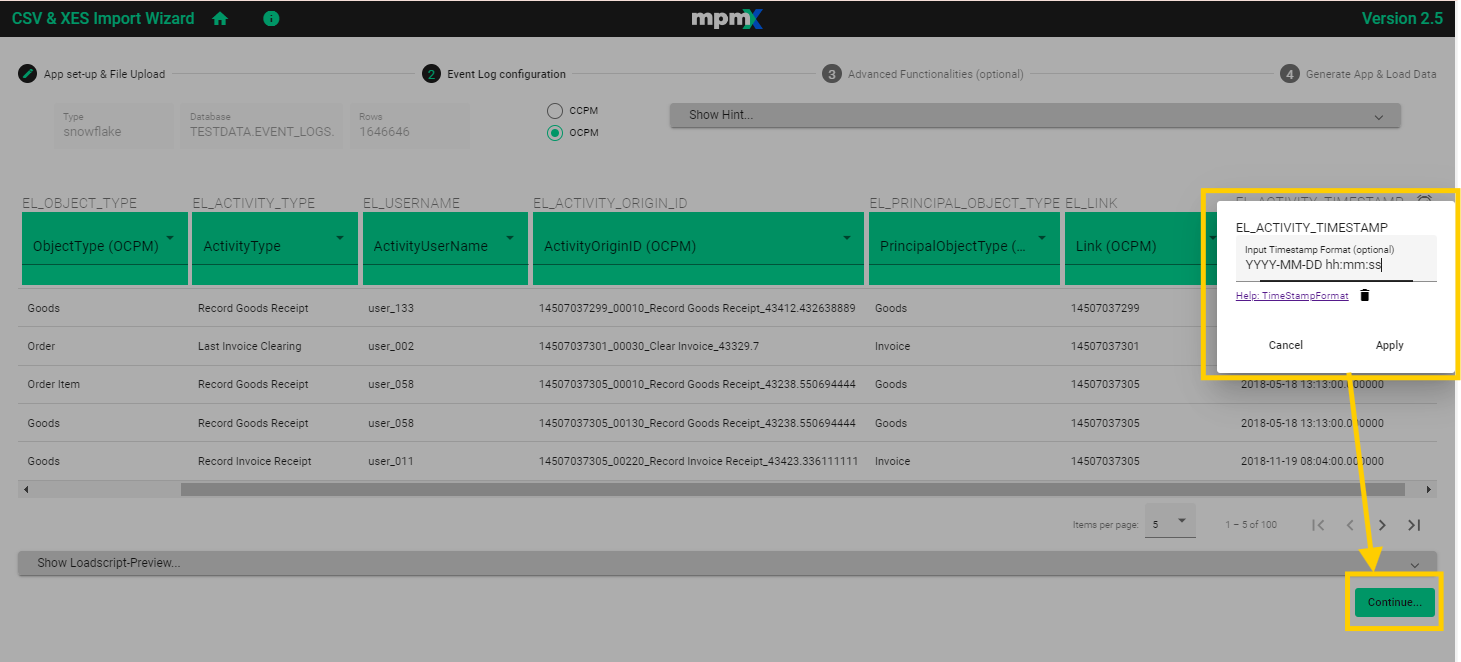
In this example, after selecting the OCPM fields, we have to scroll to the right to find the Timestamp field. It is a single timestamp so select ActivityStartAndEndTimestamp.
Next click on the small clock icon and apply the format that matches the timestamp.
There are five Case Dimension fields that can be used, if desired, and a Geofield.
When done with the settings, click "Continue" to move on to the next tab.
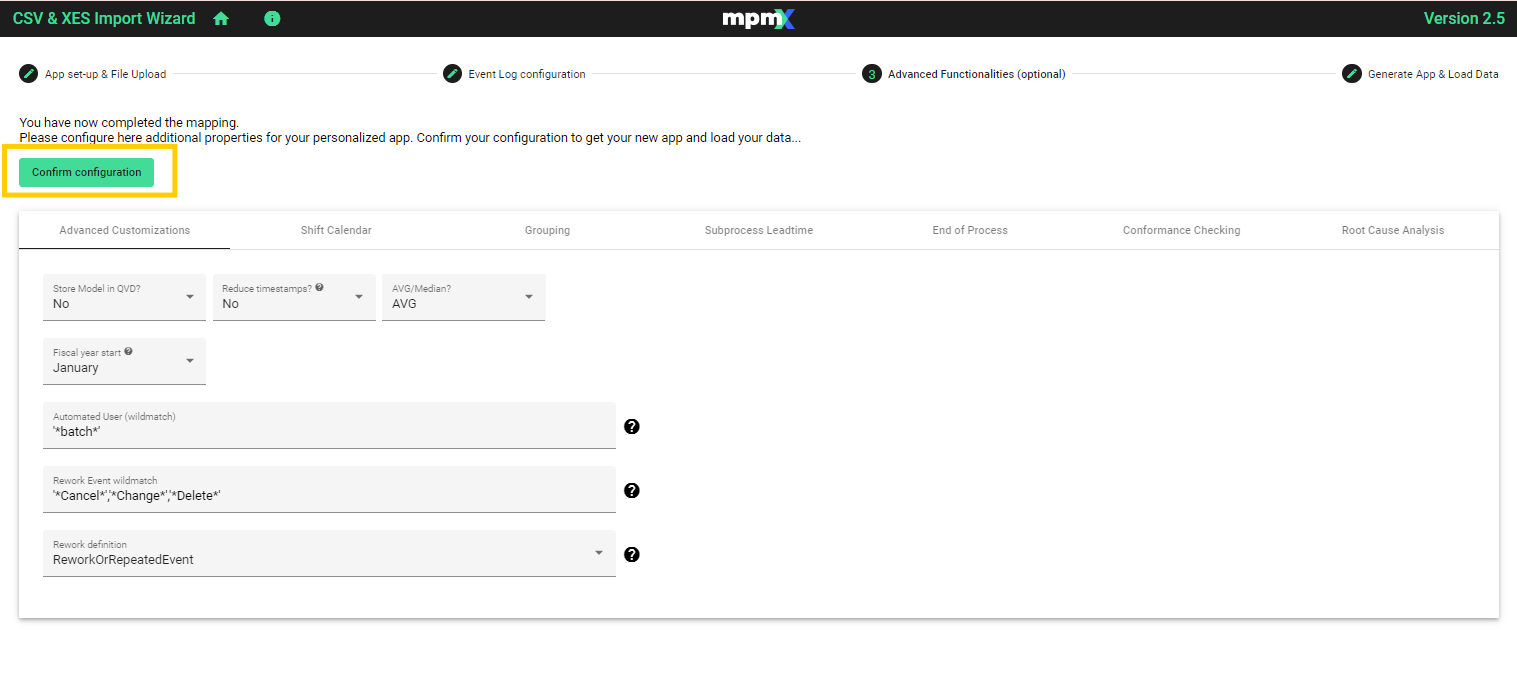
Tab 3 - Advanced Functionalities
This section is the same as described in the Tab 3 - Advanced Functionalites Tab section.
After completing the setting on the various Advanced Functionalities tab (or choosing to skip them completely), click the green "Confirm configuration" button in the top left corner to generate your app.
Tab 4 - Generate App & Load Data
The app will generate automatically after clicking "Confirm configuration" on the previous tab. If everything was successfull you will see it in the final line of the script box.

Use the link provided to go directly to your app.
Open the App
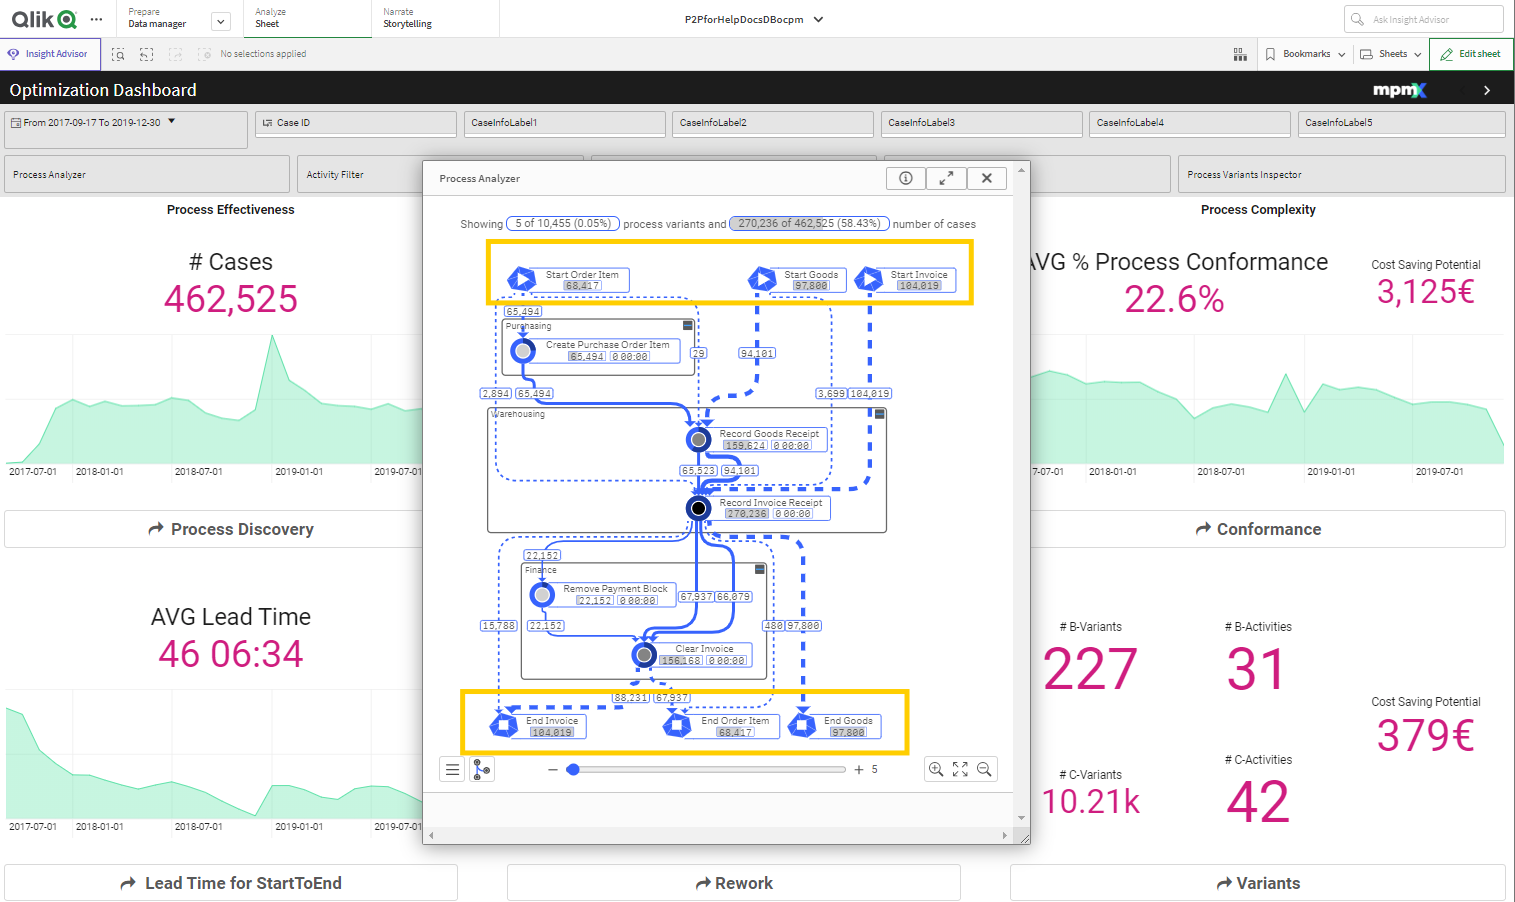
Open the first sheet - Optimization Dashboard - and see all the relevant KPIs.
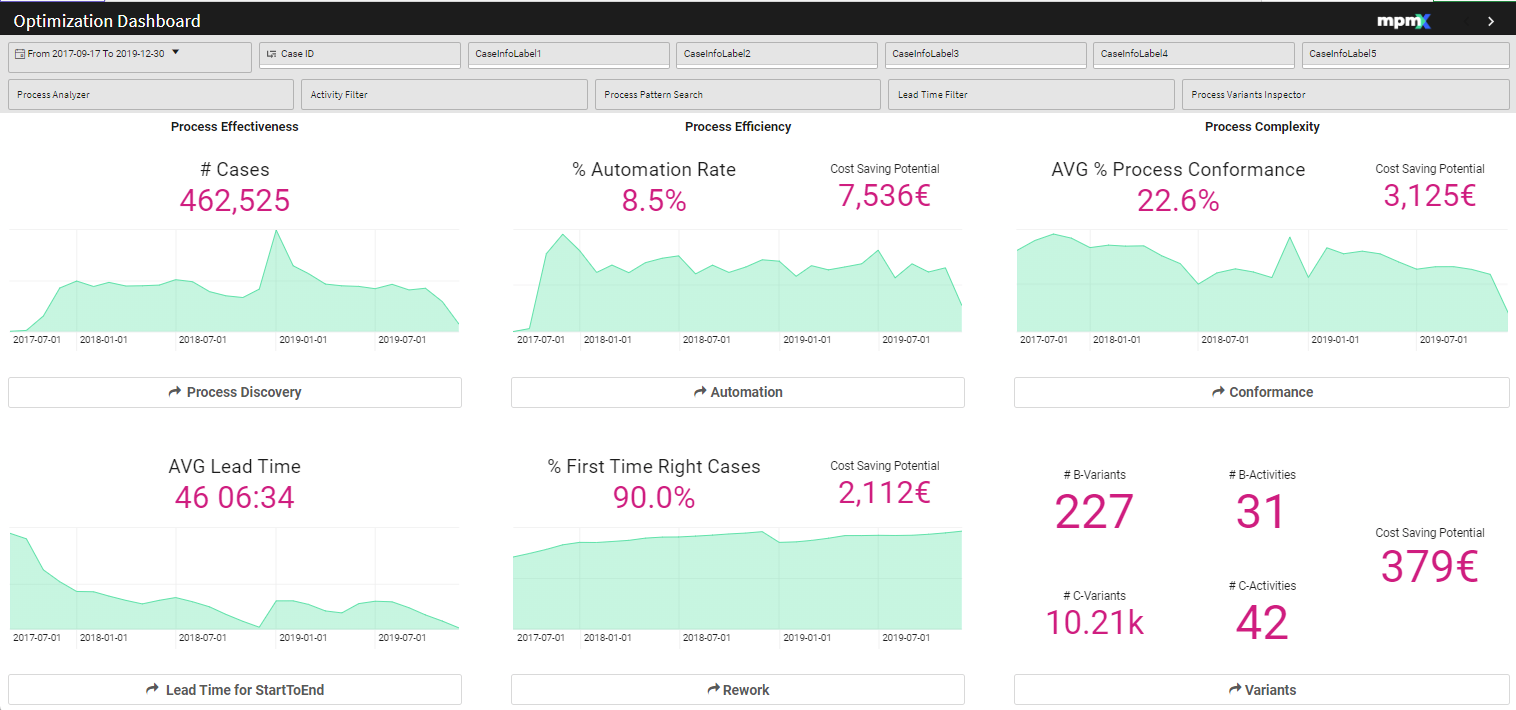
Click on the grey "Process Analyzer" button in the top menu bar on the left to see the start and end of three objects in this process and the groups that were created.
