CSV Upload EventLog Scenario
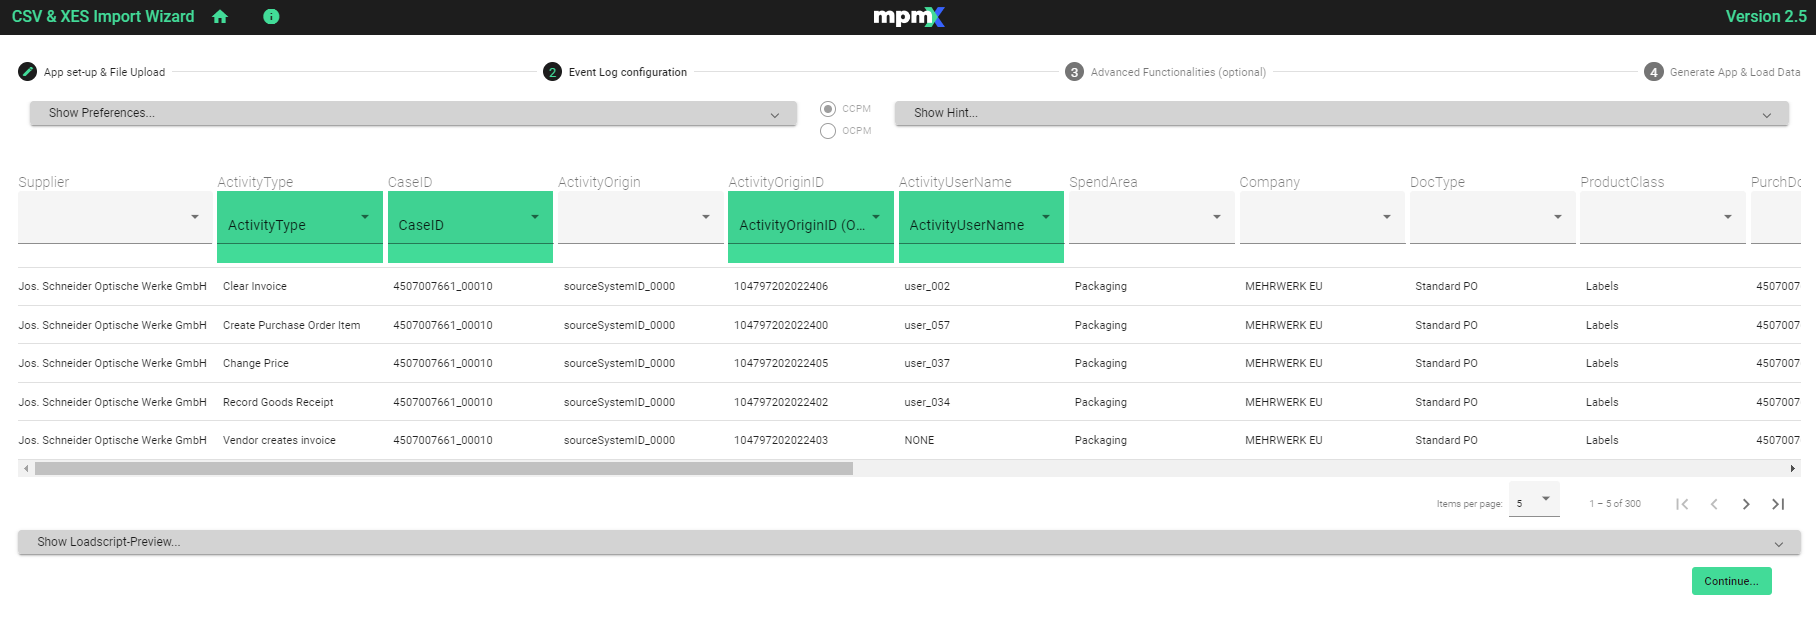
On the Event Log Configuration page you can check your source data and assign your source fields to the required mpmX standard event log field names, as well as define timestamp parsing patterns if required.
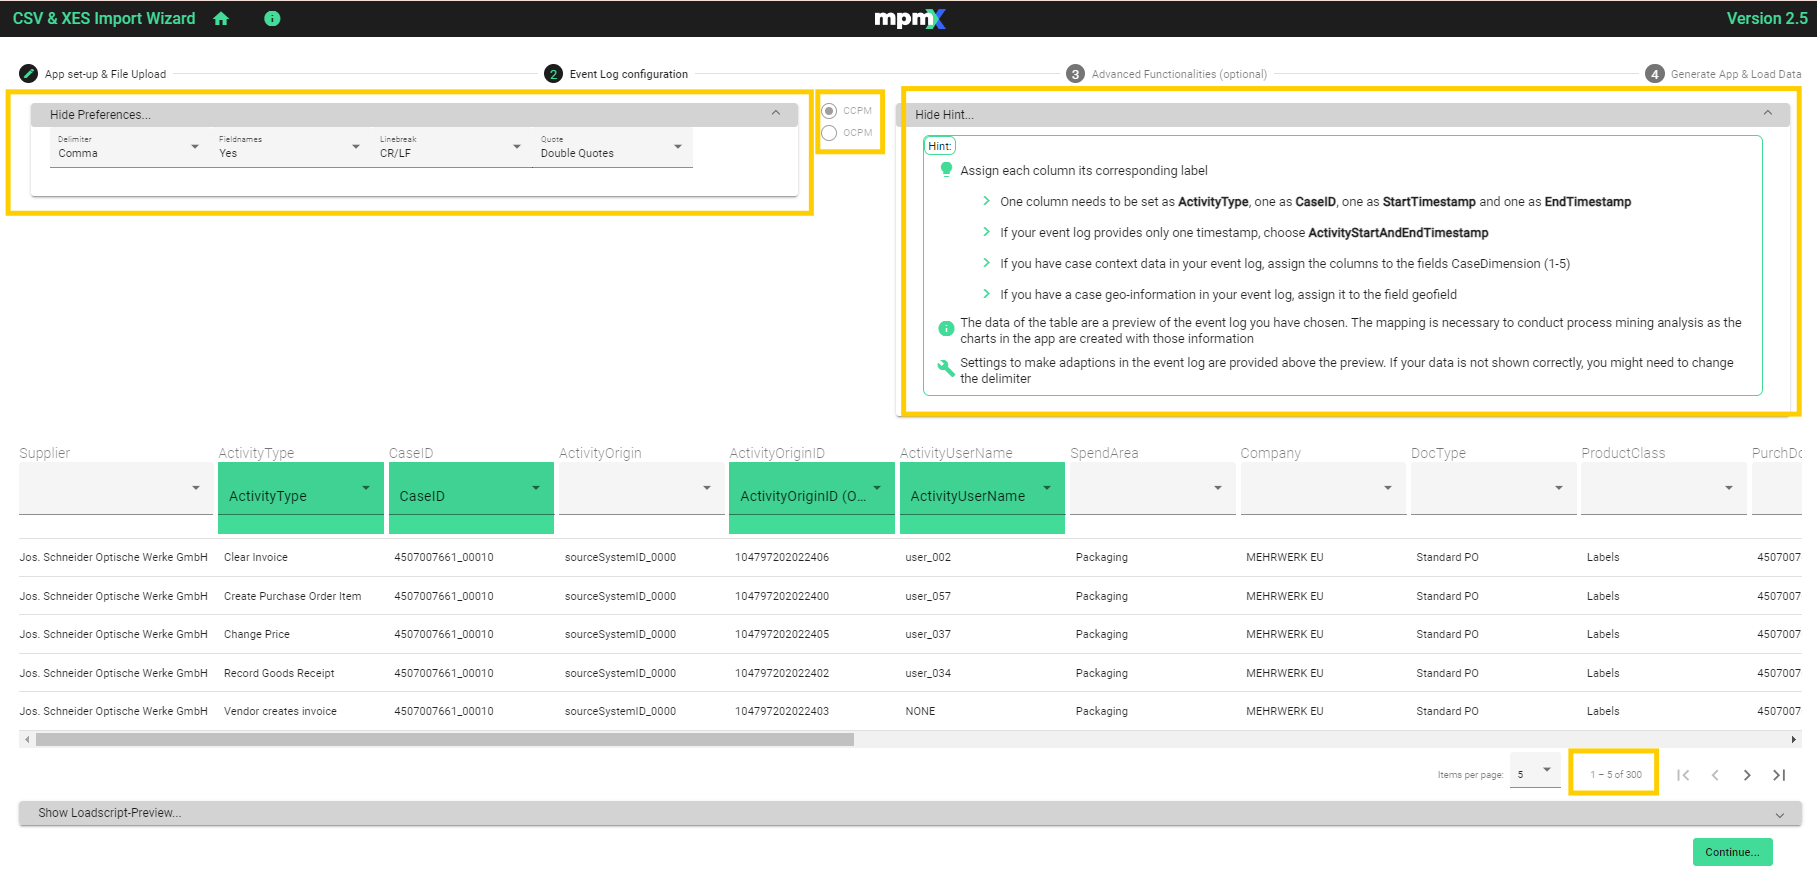
Show Preferences, Show Hint
At the top you will find a couple of Show/Hide boxes and settings.
- The new Show Preferences section shows the parameter settings that you made on the previous tab. If you wish to change them, you can do so now.
- You also see two radio buttons indicating whether you are using a traditional Case-Centric Process Mining (CCPM) process or an Object-Centric Process Mining (OCPM) process.
- A Hint box contains some useful information.
- At the bottom right, you see how many lines of data are showing out of the total amount (1-5 of 300).
Show Loadscript
At the bottom of the page you can expand the Show Loadscript. At the bottom of the script it shows the name of your qvd file and where it is stored.
Your source csv is now changed to a qvd file. The main benefits are speed, compression efficiency, and consistent processing at the end of the wizard, which improves performance when the files are read multiple times.
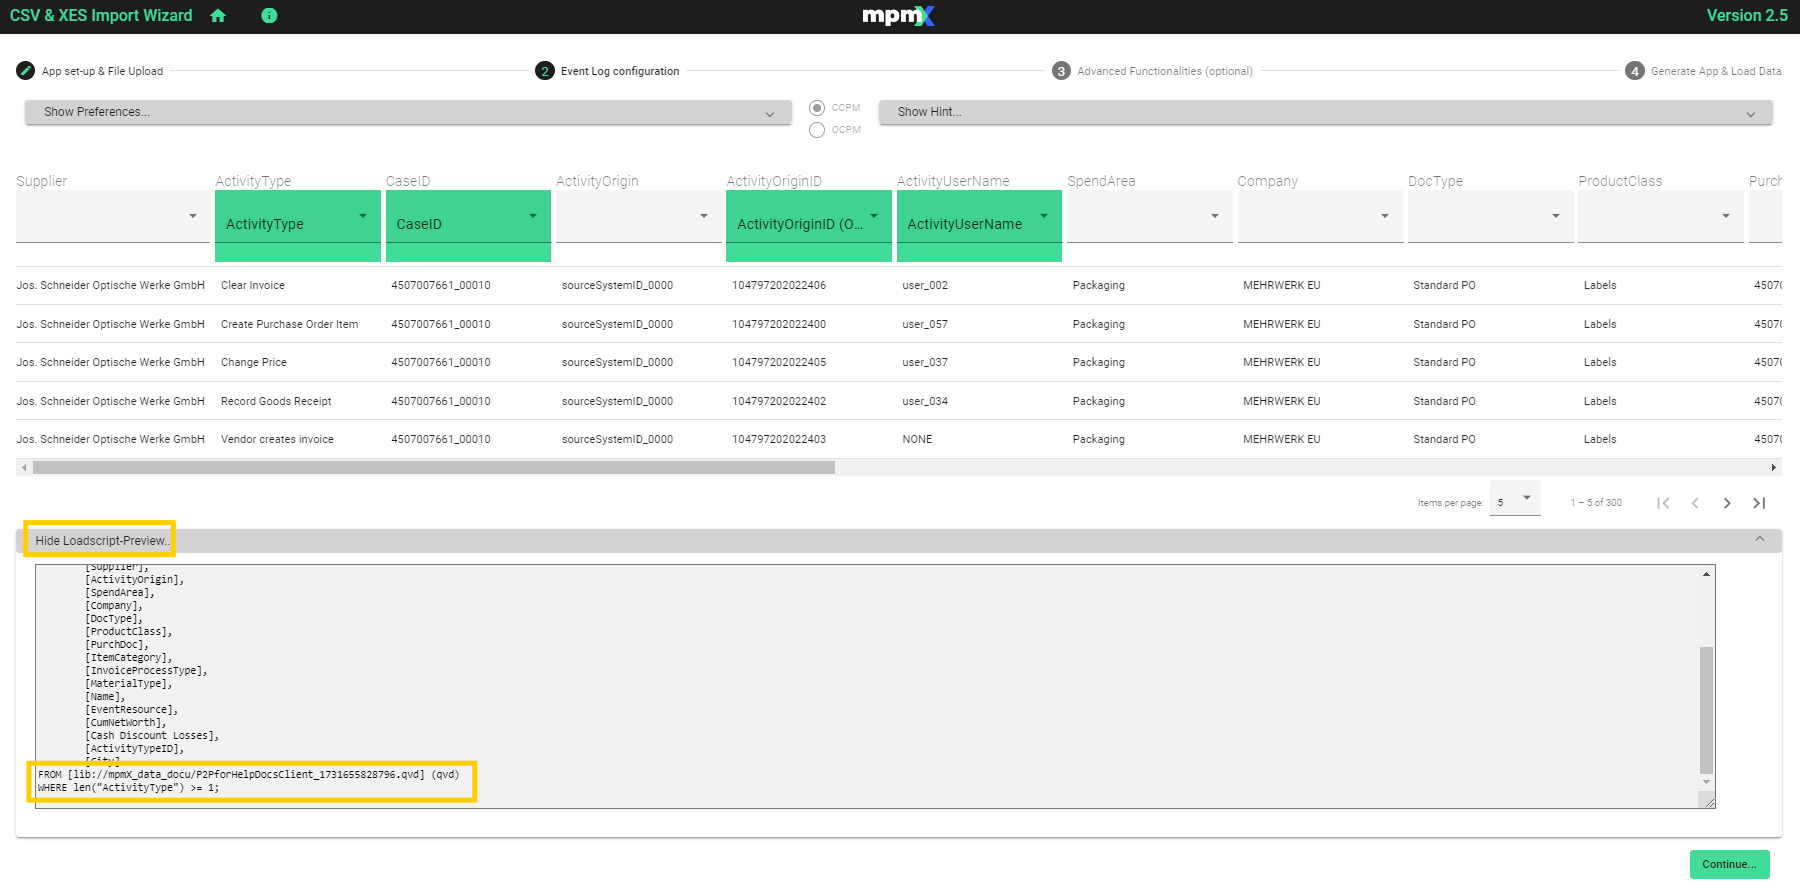
In the Loadscript you also see some ad hoc generated pseudo code.
This code only offers an idea of what processing steps will be prepared in the background to enable the mpmX core to derive a complete process mining model based on the event log and definitions. It is not the actual code which is later executed. At this point it is only the high level concept and the import part is the field assignment / renaming as well as optional timestamp conversion. The real execution code can be later seen in the sub mpmX_execute after the final generation of the app.
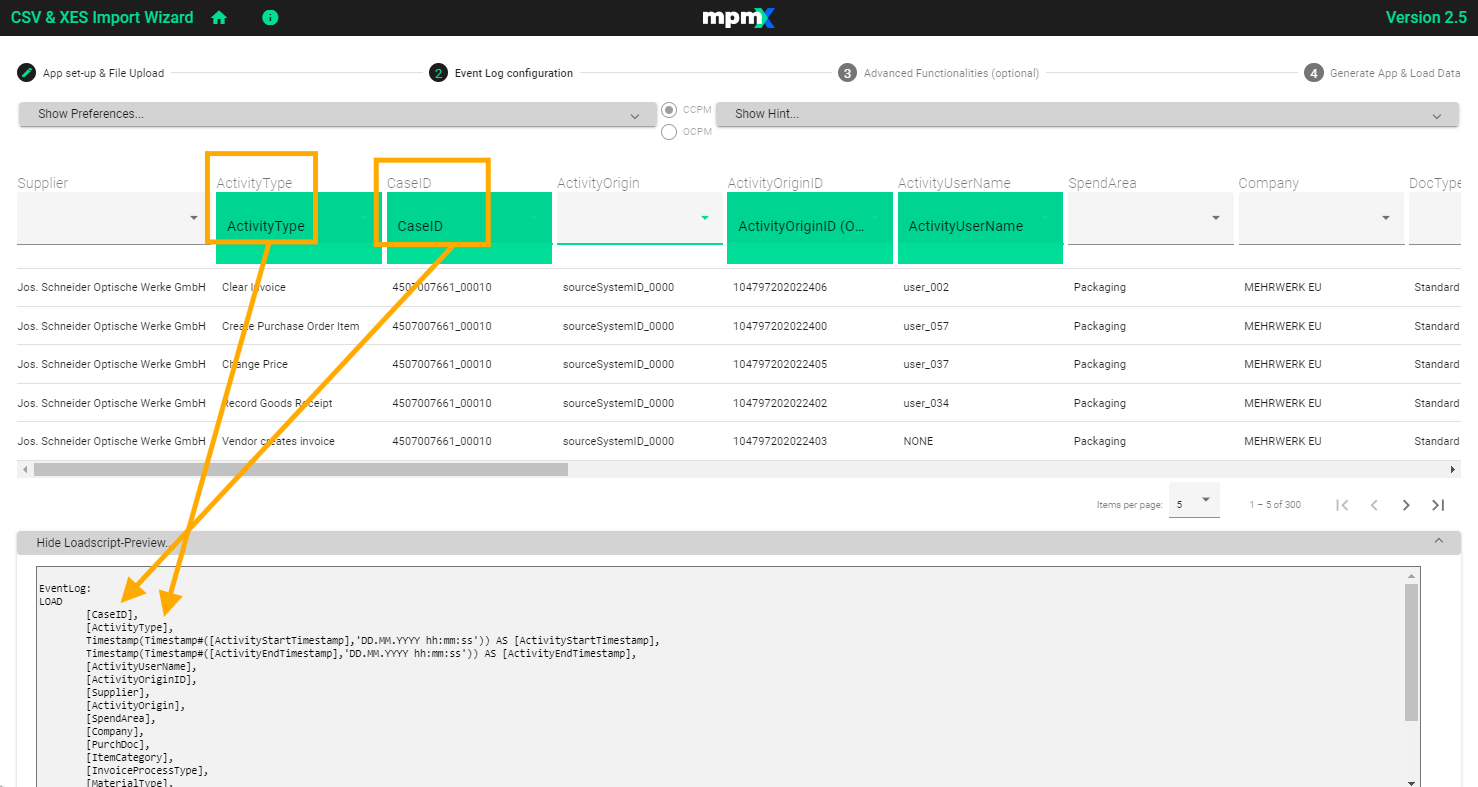
As you assign the fields in the table, you will see the changes show up in the Loadscript.
Assign the Required Fields
Use the dropdown options to select the mpmX standard field names and assign them to your own data.
The names of the columns reflect the data in your event log and so will vary in name and order when using different event logs.
Three fields are required, as mentioned in the Hint:
- ActivityType (The name of the activity)
- CaseID (A unique numeric identifier)
- Either the single ActivityStartAndEndTimestamp or the two individual start and end timestamps
If either of these required fields are not mapped then the "Continue" button will not activate and you will not be able to click it.
As you map the fields, you see the changes showing up in the Loadscript below.
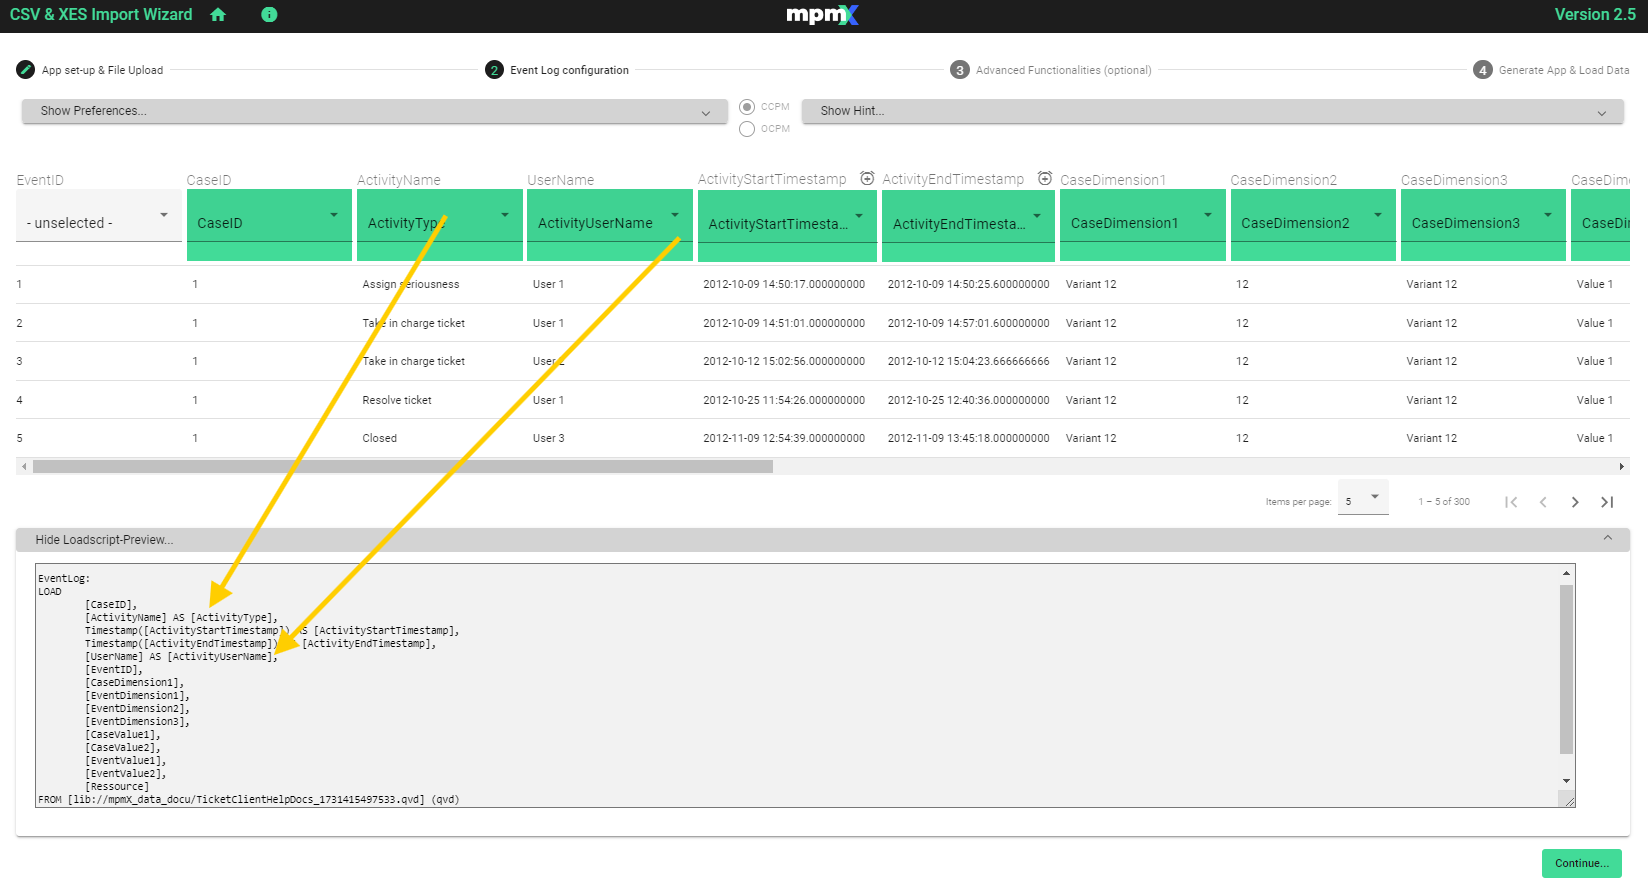
If your event log happens to already use the same naming conventions as mpmX then they will be automatically mapped and no change will be required in the Loadscript.
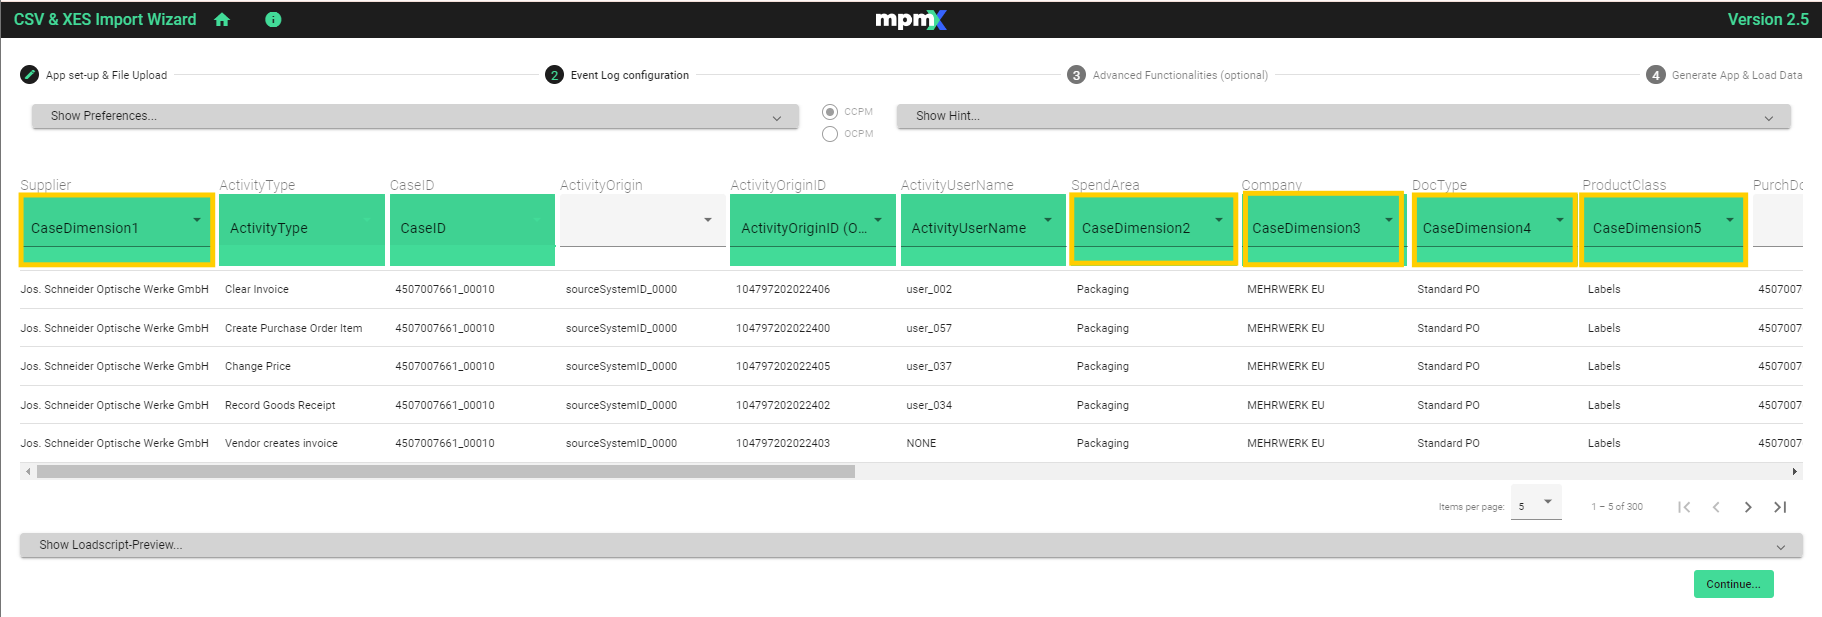
Assign Case Dimension field (optional)
All other fields are optional and you can continue and mine your data without them if you choose. Any fields that do not get assigned are still transported to the end and loaded in the application for later usage. No field will be lost.
It is a good idea, however, to add the various Case Dimensions to improve your analysis capabilities. It is important to know your data and understand which fields will be used as case context information and event context information
Do NOT assign event information as case information or you may get incorrect results from your app.
If you load event information as case context information, then the casecounter field is multiplied and the KPI #Cases will be wrong. This is a common error that new users make.
Specify your Timestamp Format
In this CSV Upload EventLog scenario, it is important that the timestamps from the source files (in this case local csv or xes files) are formatted correctly. If the timestamp formats are not or incorrectly defined, errors will occur during the later mining process and the event data will not be displayed correctly. It is therefore necessary to define the corresponding timestamp format. How this works is described in more detail below.
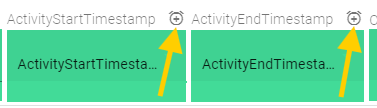
Scroll to the right to find the timestamp field(s).
- If you have a single timestamp choose ActivityStartAndEndTimestamp
- If you have two, choose ActivityStartTimestamp and ActivityEndTimestamp
Next you need to click on the little clock symbol next to the Timestamp column name to specify the format.
Look at how your own timestamps are configured and apply the matching format. The time format can vary across different logs, so pay attention to its formatting.
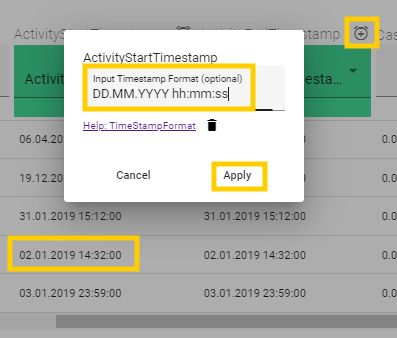
To learn how to format timestamps have a look at "How to format Timestamps"
Geofield (Optional)
You may have geographical data in your event log, such as Country, Region, City, etc.
Select Geofield for this type of data.
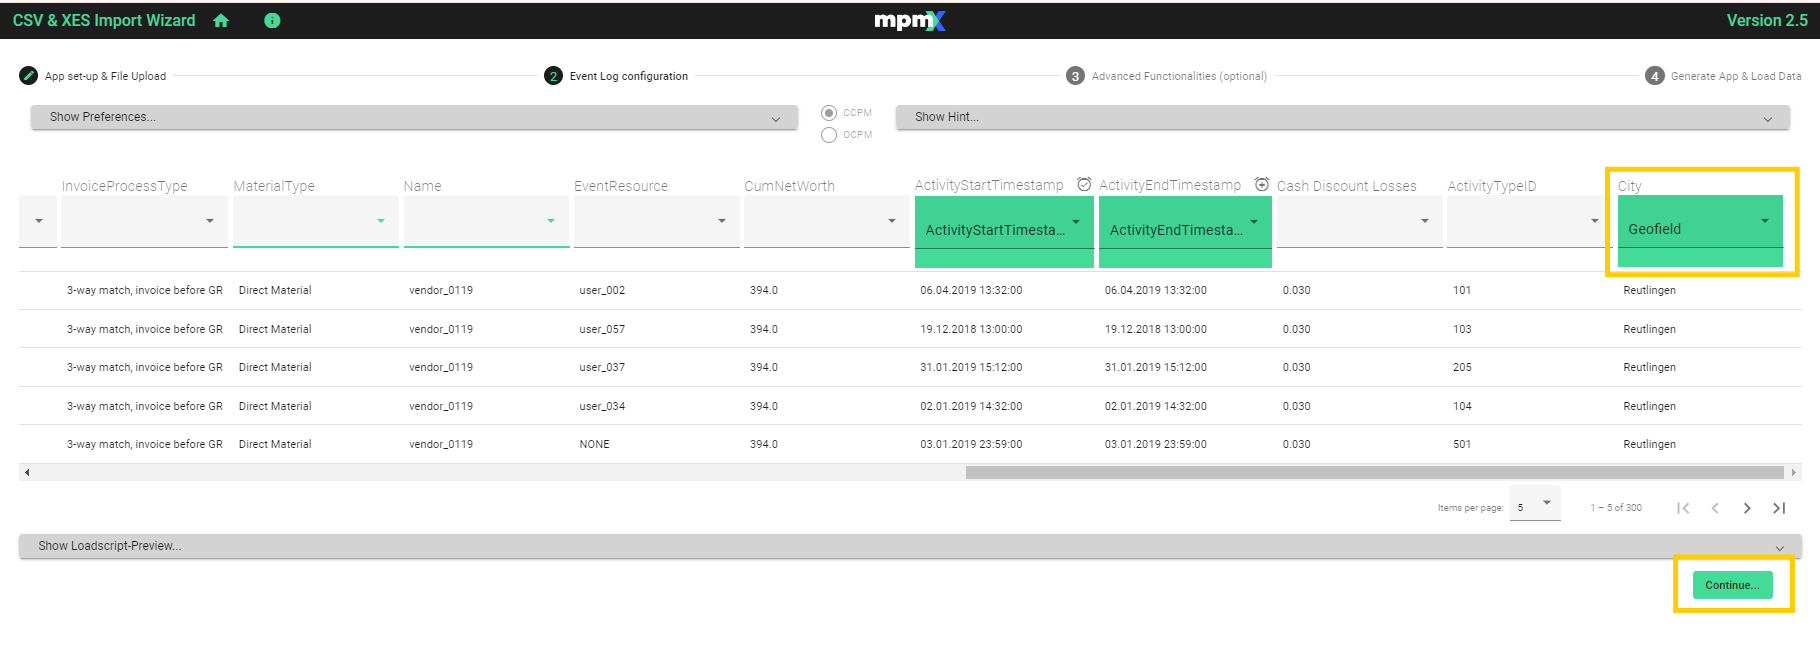
When you have finished assigning all the fields, click "Continue".