Tab 1 - App set-up & File Upload tab
When you first go to the mpmX Import Wizard link, you have a choice to create a new app or edit an existing app. Click on the "Create new app" button to get started.
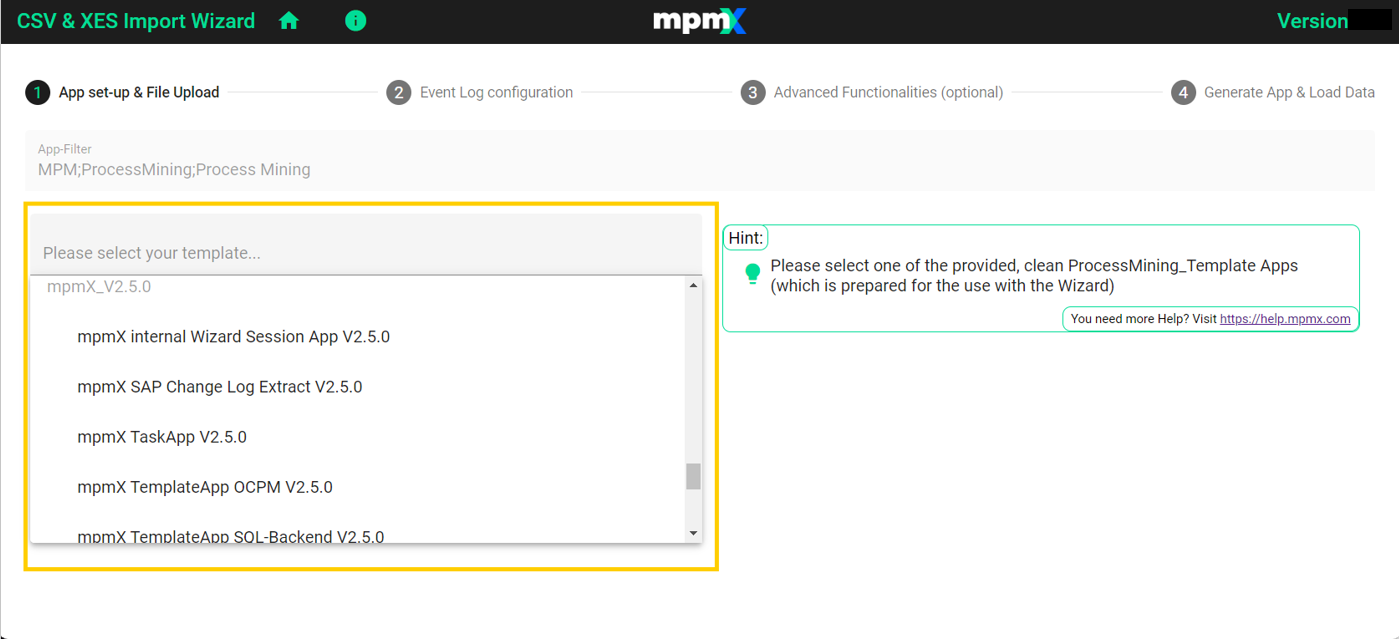
1. Select the Template App
First, you need to select which mpmX Template App to use with the Import Wizard.
- Notice that above the selection field is an App-Filter box. Only apps whose names have words that match the options listed in the App-Filter box will show in the dropdown.
- A standard TemplateApp comes with the installation - called "mpmX TemplateApp Wizard". This could be copied, modified, and/or renamed to suit specific needs.
Make sure that you chose an actual Template App for use in this field.
The apps that show up in this list will simply match the search patterns you configure, shown in the App Filter line above. This does not mean that every app will be compatible for use with the Import Wizard. So it is very important that on first setup you create and use a naming convention that identifies proper Template Apps to avoid any confusion.
2. Define the name for your application
A good convention is to not use spaces in the name.
These characters are no longer allowed to be used in the application name:
\ / : * ? " < > |
This avoids problems and makes the system more stable.
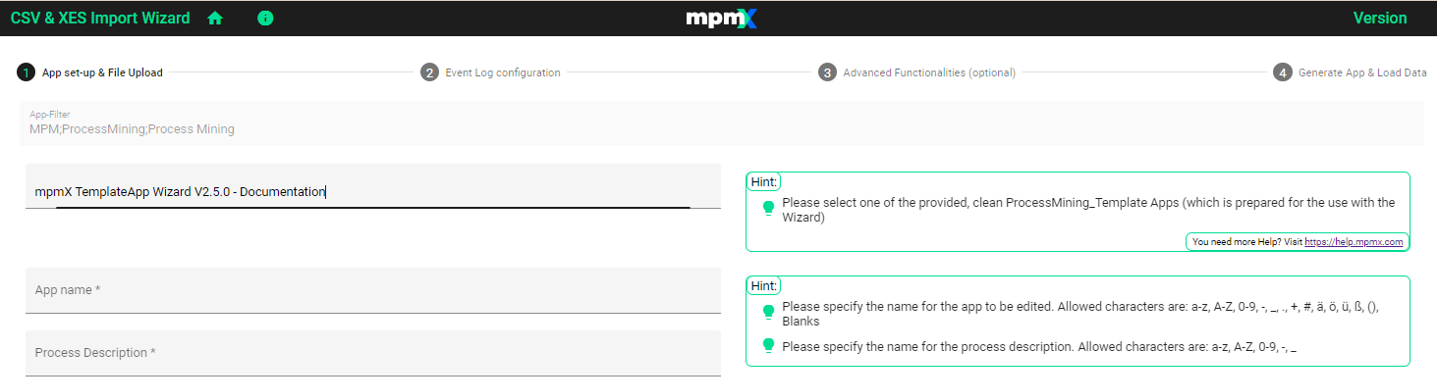
3. Give your app a description
This does not have to be long, but should clearly identify the process type or any other important information.
Only after the description has been entered will you see the options from where to upload your data.
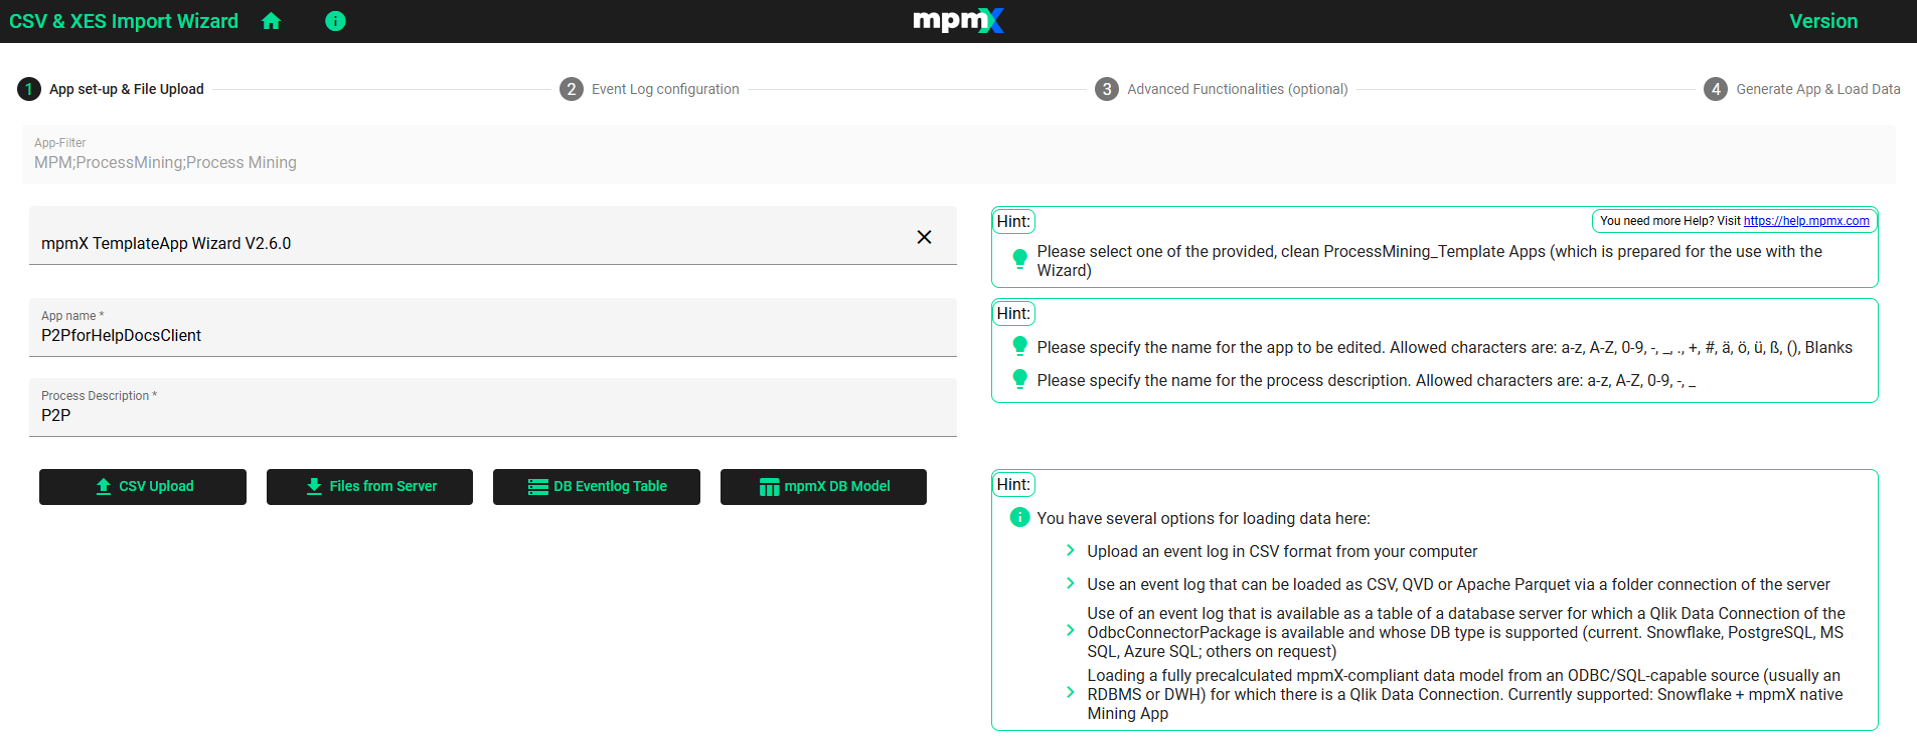
4. Select the option from where to upload the event log or the precalculated mpmX-compliant data model
There are different options to choose from. Depending on which one you choose different selections will be required to define which event log (or precalculated mpmX-compliant data model) should be loaded and how it is accessed and what is displayed on the next tab.
Below are different tabs inside the Help Documentation, representing the options you have to upload your data. Click on the preferred tab to see the correct instructions for that upload option.
In each example we use a Case-Centric Process Mining example. Here is a link where you learn more about how to create an Object-Centric Process Mining process with the Import Wizard.
- ⬆️ CSV Upload
- ⬇️ Files from Server
- 💾 DB Eventlog Table
- 📊 mpmX DB Model
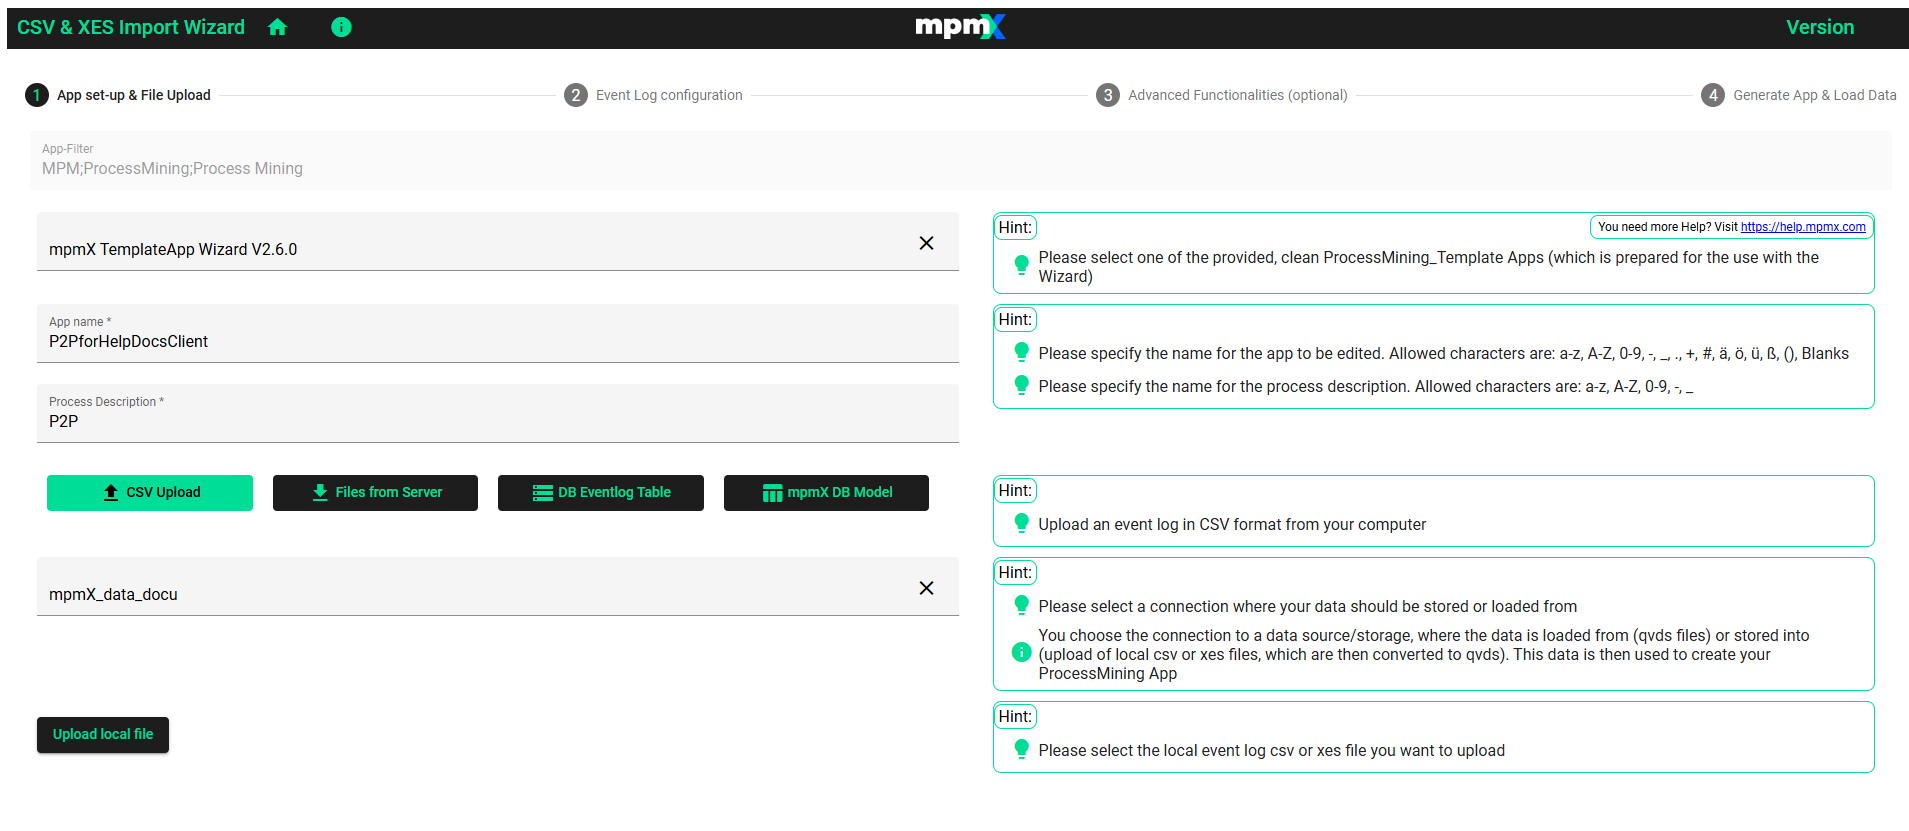
How to do a CSV Upload
-
Click "CSV Upload".
-
Select your folder connector
- Click in the field to get a dropdown with the connection choices.
- Choose the connection where your CSV data will be saved
Select your folder connector
-
Find your data file
- Click "Upload local file"
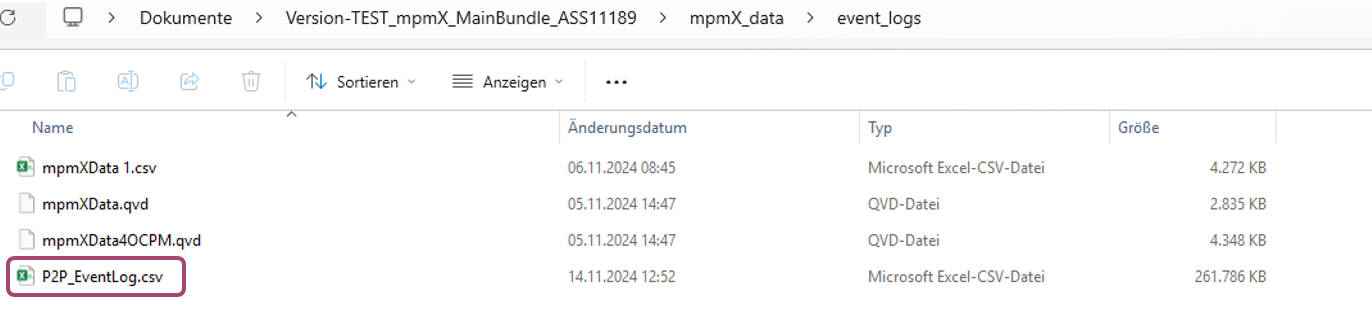
- Navigate to the folder where your csv file is stored, select your event log, and click "Open".
- In our example it is stored in the mpmX_data_docu/ folder.
Select your event log
-
If necessary, adjust your parameters to configure how your file is read in. Normally, the appropriate parameters are recognized automatically.
The following parameters are available:
- Which delimiter sign is used in the csv: Comma, Semicolon, or Blank (space)
- Whether the field names are included in the csv file or the header: Yes or No
- Which line break control is used (like under Linux or Windows for example): CR (Carriage Return), LF (Line Feed), or both
- Which quote option is used when content is in columns: Auto-Detect, Single Quotes, or Double Quotes
- The name of the Eventlog file that you selected is automatically shown.
The wizard will try to automatically detect the correct settings, but you can adjust them if required as they may not always be detected automatically. All of these settings ensure that the file gets read in the correct way.
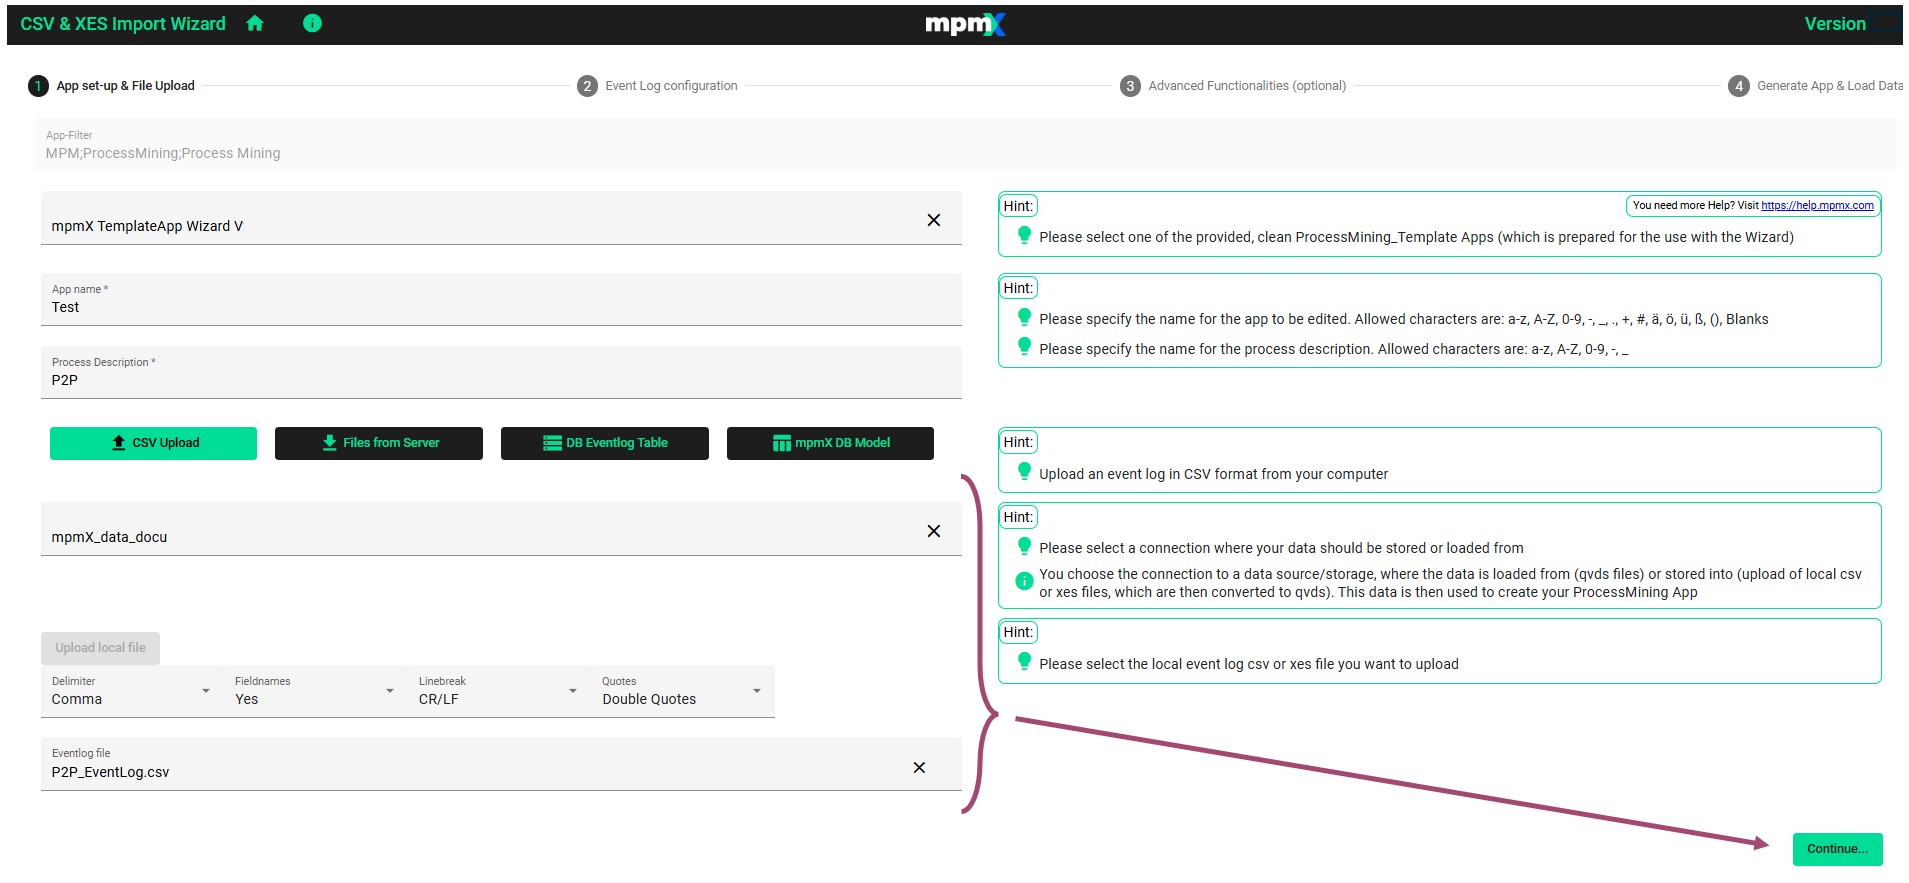
- Click "Continue" to preview the selected event log.
Now you will be taken to the Event Log Configuration page (for CSV Upload).
How to load Files from Server
-
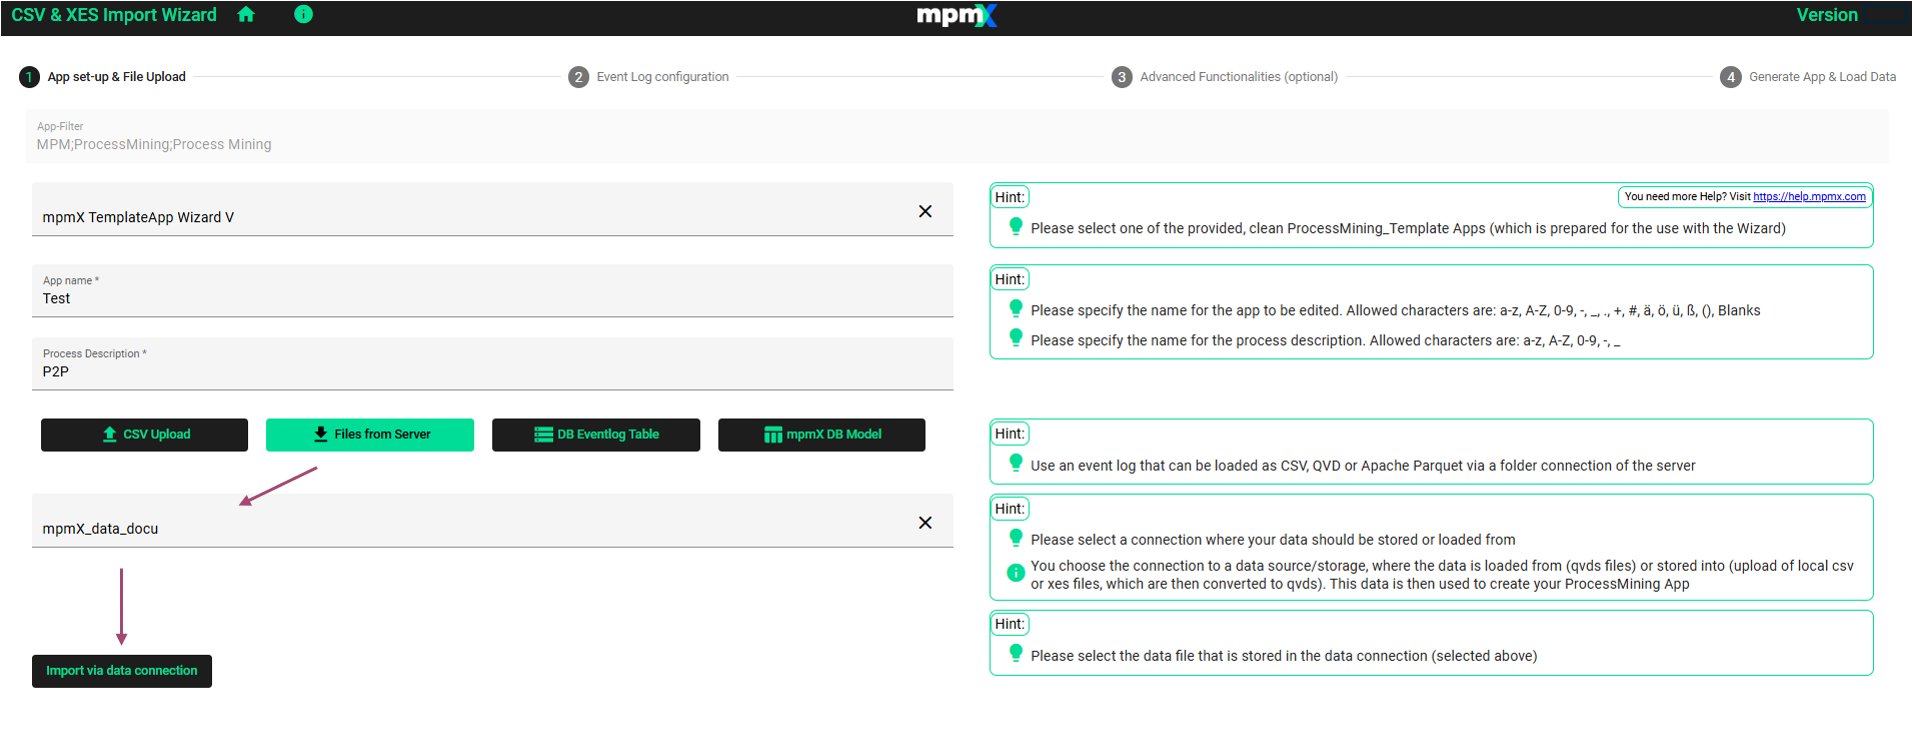
Click "Files from Server".
-
Select the source connection
- Select the source connection in the dropdown.
- Click "Import via data connection"
Files from Server
-
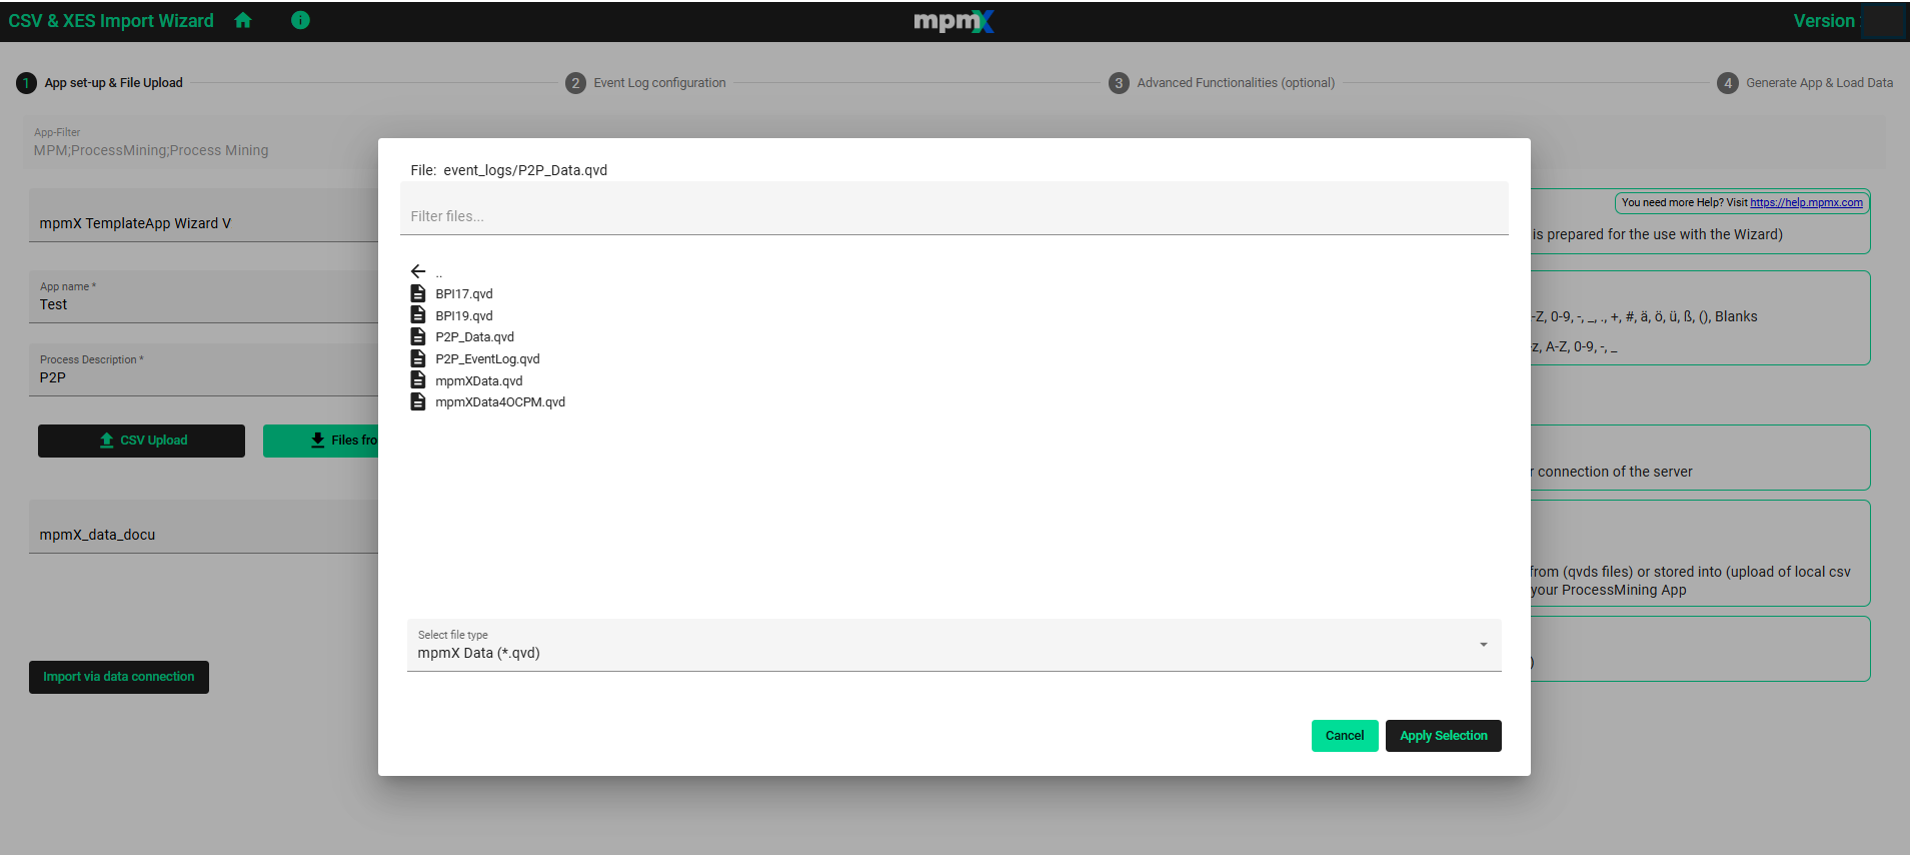
Select the data file
- Navigate to the folder on the server where your event logs are stored
- From the Select file type dropdown select the file type (qvd, csv, or Parquet)
- Select the event log
- Click "Apply Selection"
Select data file and Apply Selection
-
Click "Continue" to preview the selected event log.
Now you will be taken to the Event Log Configuration page (for Files from Server)
How to Load from a Database Eventlog Table
We will start off with some preliminary information. If this is not of interest, scroll down to the next section - How to Load from a Database Eventlog Table. We currently support Snowflake and Postgres and will be expanding the database types in the future.
Correct Database Setup and Configurations
The standard installation of QlikSense offers about 40 database connections to different data sources. The Import Wizard only works with databases which support SQL, so mpmX filters on the Qlik ODBC connector package to define the subset of connections which are ODBC compliant and to relational databases or data warehouses which support SQL. We currently support Snowflake and Postgres.
Depending on how the connection is defined by the QlikSense administrator and the technical possibilities of the backend, we can sometimes preassign the correct values, otherwise you need to select them manually.
Here is some technical background information.
- In addition to a Database/Datawarehouse connection, we need the fully qualified name of a table which must always consist of the three parameters and the notation database.schema.tablename. Optionally, a warehouse, role, user, password, etc may be used.
- Some backends (like Snowflake) with the specific Qlik connector can establish a connection without predefined database and schema values. In that case the correct one must be selected from the list, because depending on the permissions of the current user, there may be more than one option to select from.
- Other backends (like Postgres) do not allow Qlik connections without defined database and schema values in the connection. If a user needs access to multiple databases or schemas, then the Qlik admin must provide more connections.
- The Import Wizard first checks the content of the connection definition on the Qlik server.
- If it finds values for the database (the names for this information differ depending on the type of connection) and schema, we use these values as a preselection in the dialog. With Postgres these are the only working values and in other scenarios the most likely values are presented.
- If it finds no value, the fields stay empty and the user must select the database. Then mpmX's Qlik backend logic tries to determine the available schemas based on the selected connection and database. These are then presented for selection. After the selection we proceed with the table selection like in the scenario when both values are preselected.
- If all three parameters (Database Connection, Database Name, and Schema) are defined, then mpmX's Qlik Backend Logic determines the available tables, which are then automatically chosen for selection.
How to Load from a Database Eventlog Table
- Click "DB Eventlog Table".
- Select your Database connector in the dropdown.

-
Select the Database & Schema.
- The Database & Schema needs to be selected. It will load automatically if there is only one option.
- As mentioned above in the preliminary information, sometimes you have to manually select the database and schema and in other circumstances it may automatically be filled in.
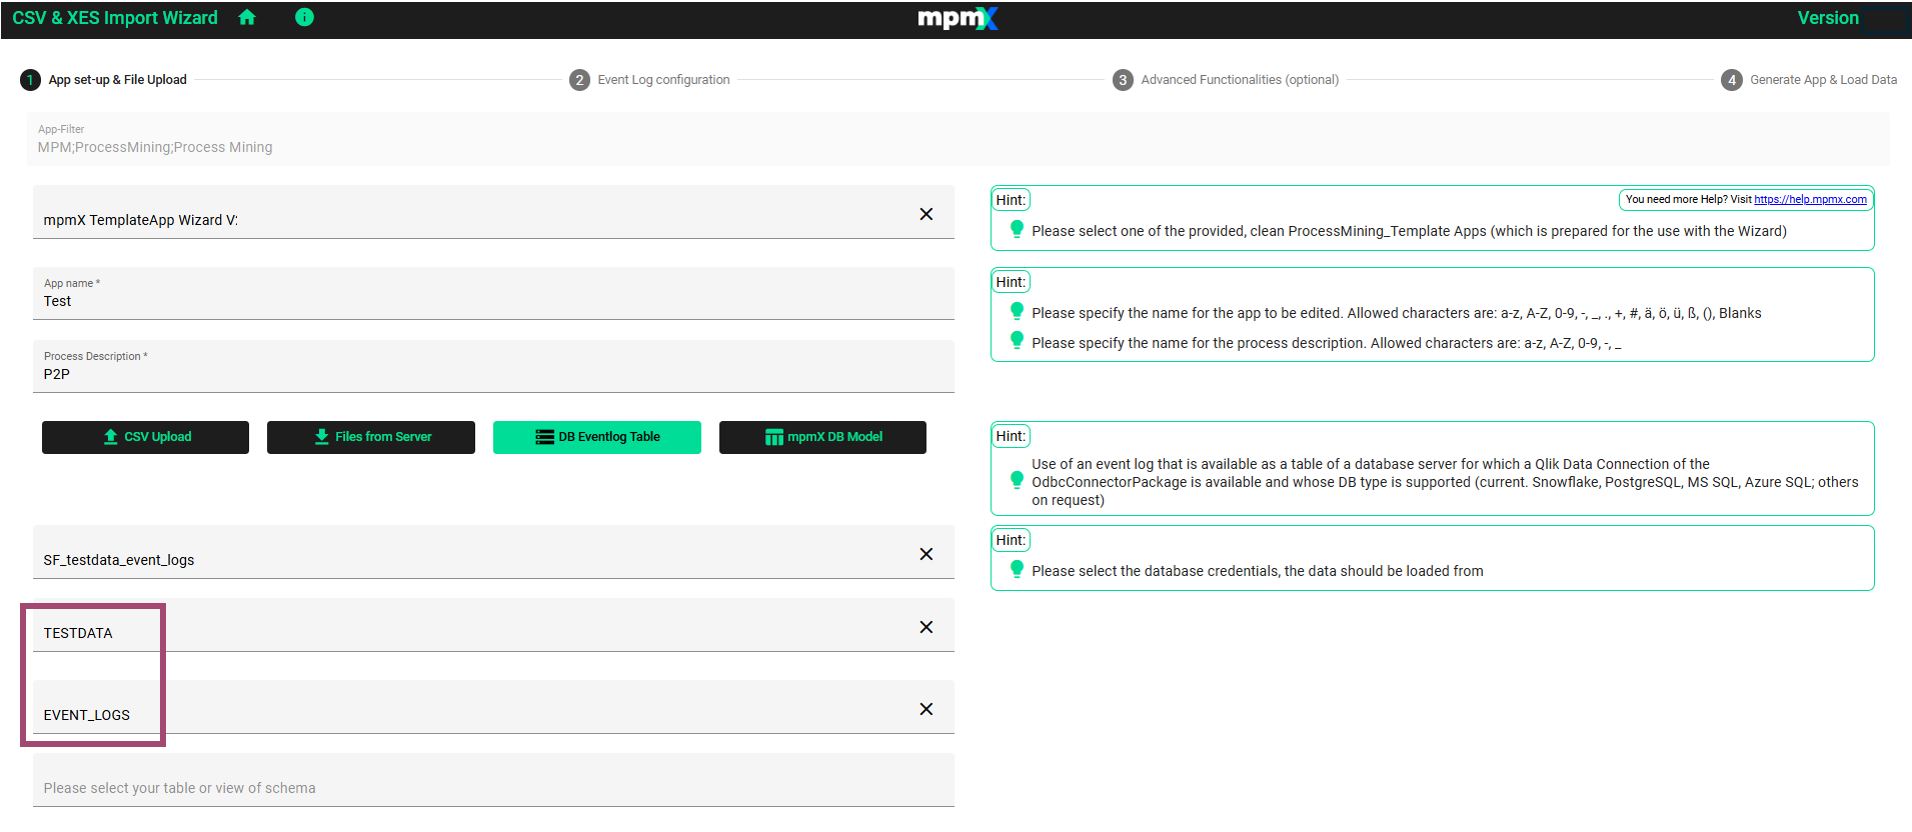
Select Database and Schema
-
Select the Table or View
- Select the event log table from the dropdown menu
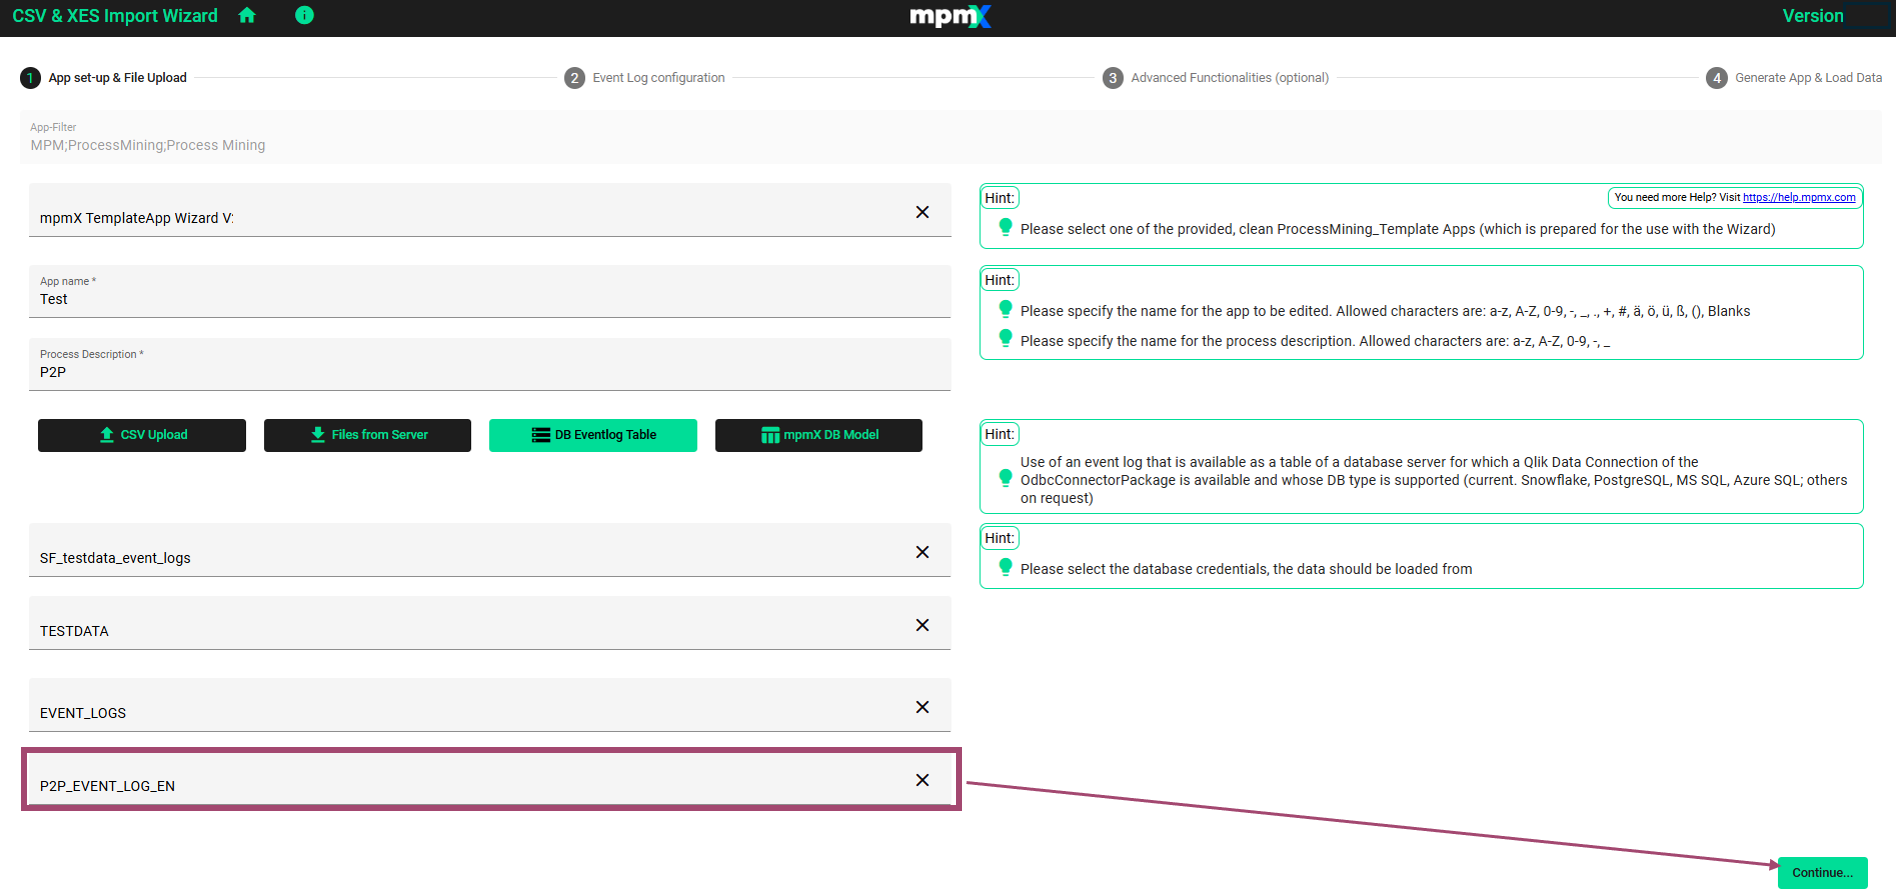
Select the Event Log Table or View
- Select the event log table from the dropdown menu
-
Click "Continue"
Now you will be taken to the Event Log Configuration page (for Load from a DB Eventlog Table)
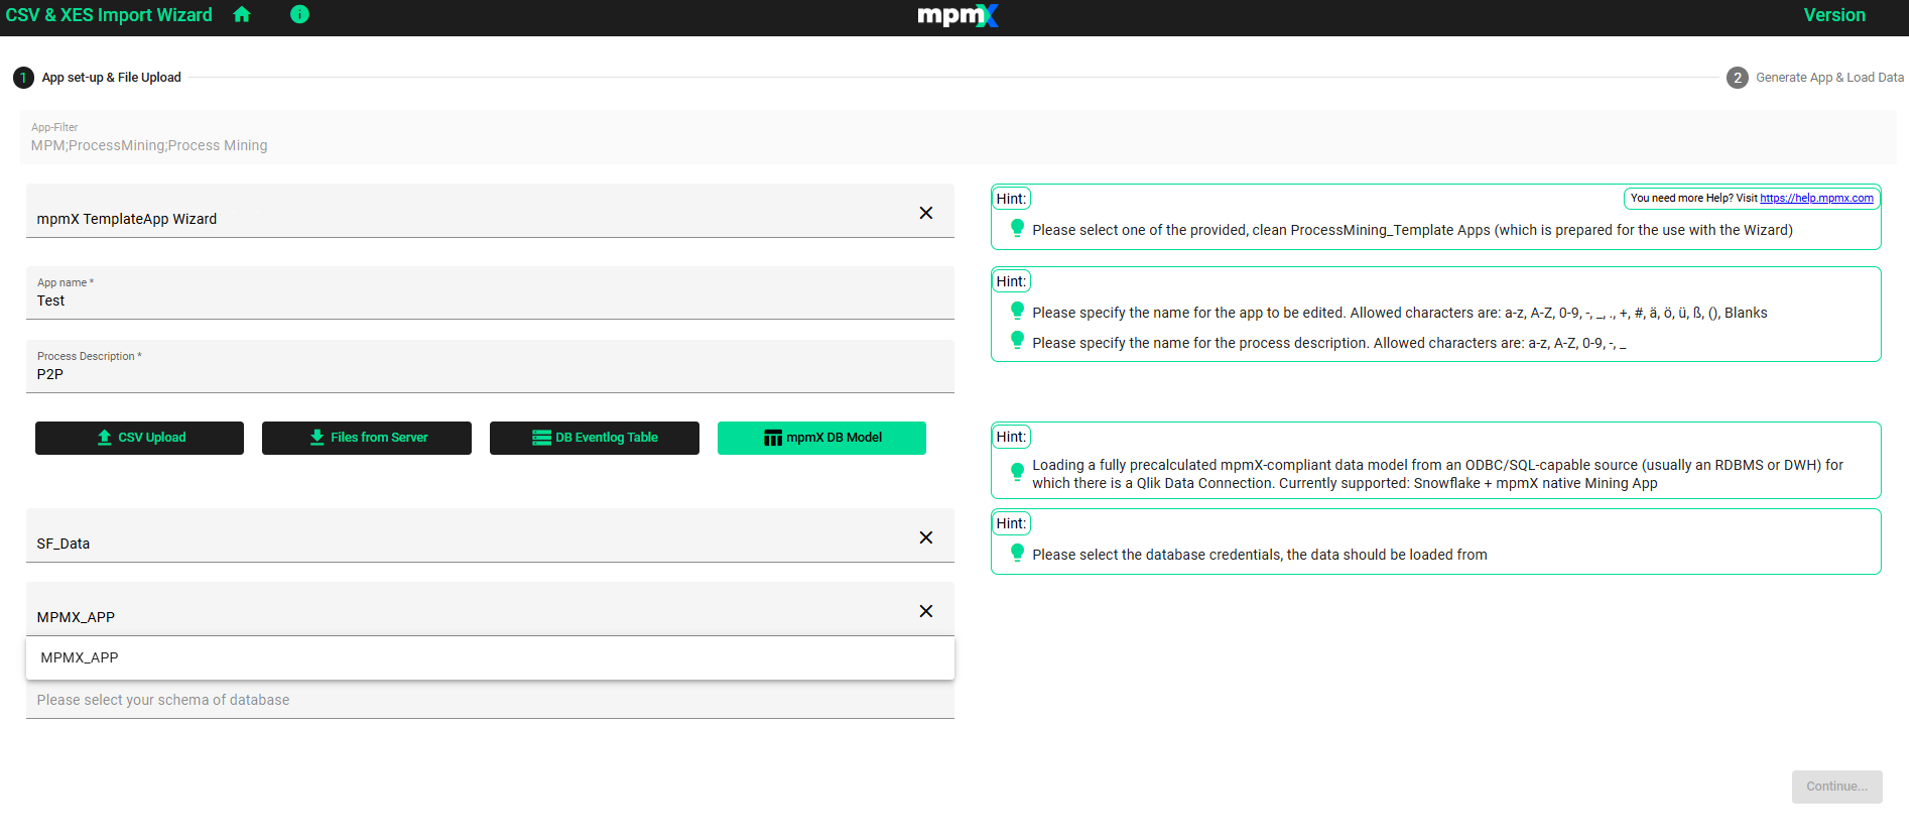
How to Load from a mpmX DB Model
This option indicates that the data mining was already done in the source database and a mpmX-compliant data model is available.
-
Click "mpmX DB Model".
-
Configure the SQL Server Connection.
- Select your desired database connection in the dropdown.
- All connections to which you have read permission are displayed in the dropdown (not just those you own)
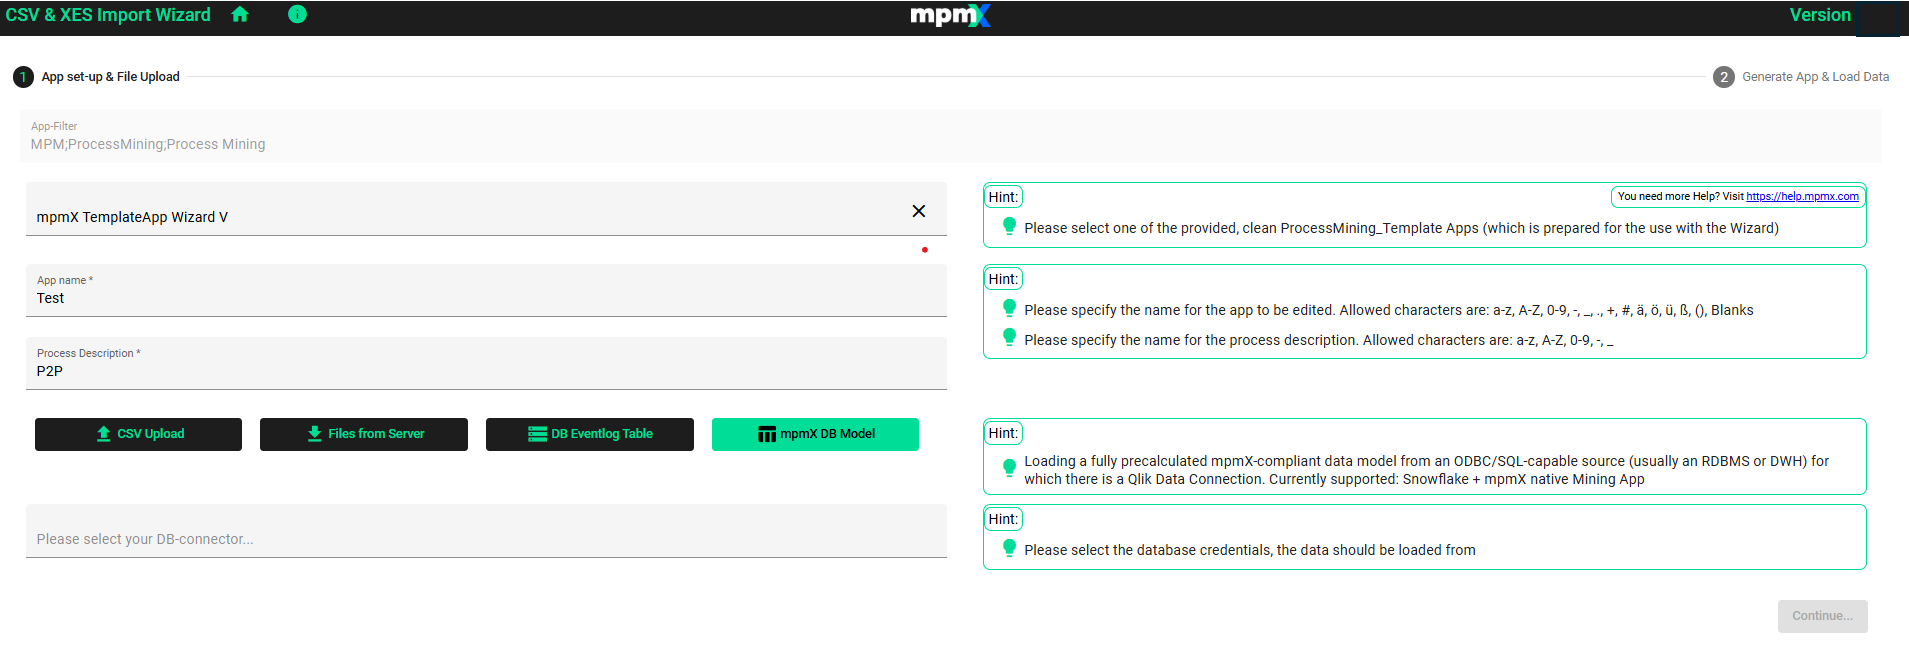
Select your DB-connector
-
Select your Database & Schema
-
The Database & Schema needs to be selected. It will load automatically if there is only one option.
-
As mentioned above in the preliminary information, sometimes you have to manually select the database and schema and in other circumstances it may automatically be filled in.
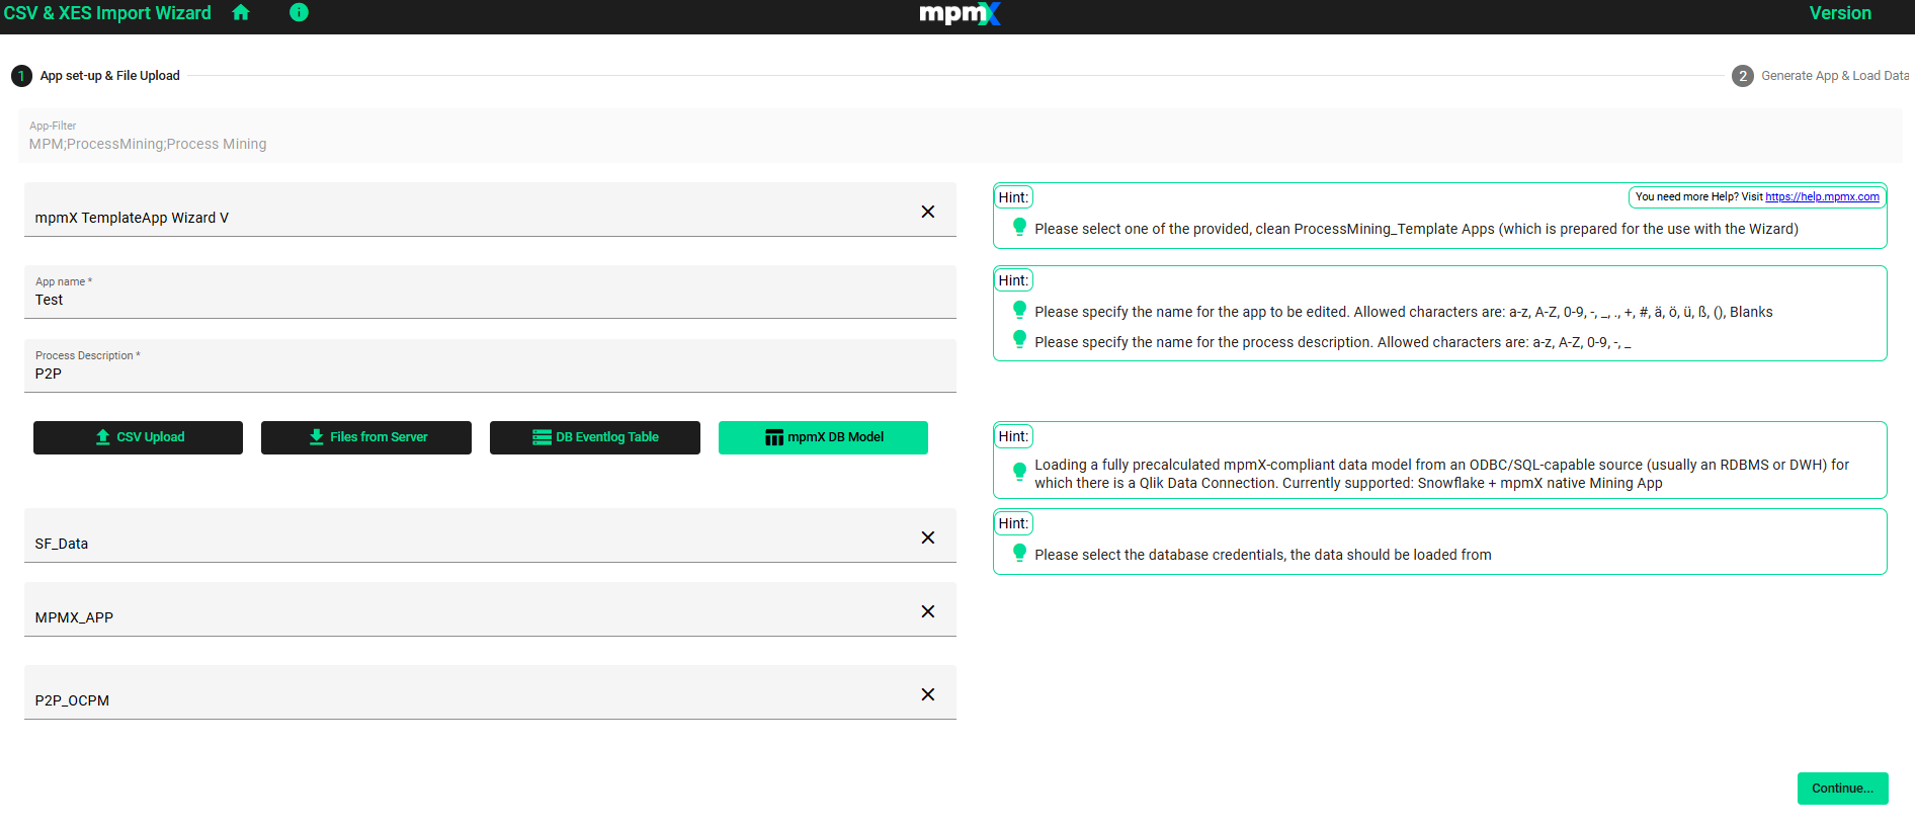
All fields filled in -
In case you want to change it, click the X-Button next to the selection, click back into the field and search manually for your database and schema.
Select the Database
-
-
Click on "Continue".
In the next step, the App will be created and the Pre-Mined Data will be integrated.

If you want to go back and make any changes to this selection, click on the "App Set-up & File Upload" Tab at the top of the import Wizard.
After selecting Pre-Mined Data, the Import Wizard will:
- Automatically skip the Mapping and Extended Configuration steps, as these are already predefined within the Pre-Mined Data Model.
- Contrary to the other variants of loading the EventLog, you are finished at this step and can now click "Generate" to generate your app.
The Import Wizard acts purely as a data loading tool in this scenario. No additional configuration is required. However, it is recommended that you check the variables and configuration in the generated script under the mpmX custom_variables and mpmX_repository sections and, if necessary, adapt them to the mining configuration in the source system (e.g. Snowflake) or to your own requirements. For example, "mpmXvActiveLanguages", "mvSelectedLanguage" or "mvReworkDefinition" are configurations that also influence the frontend. The script of the generated app should be reloaded manually so that these take effect correctly after customization.