How to Load More Than One Event Log
This page explains how to
- load several event logs into one app
- generate several process perspectives on one event log
- create a data model with these different event logs
To understand the following instructions, we assume that you are already familiar with the “Deploy the mpmX Template App” and the “mpmX Data Model”.
Loading more than one event log or several different views on one event log into the app will allow you to analyze the process form different perspectives like activity-based perspective, resource perspective, organizational perspective or control-flow perspective.
The explanation will be illustrated by taking the Helpdesk example. The aim in the example is to create not only the activity-based perspective, but also a user-based perspective. The activity-based perspective will be the main event log on which every analysis in the mpmX Template App will be available. The user-based perspective will only be an additional view, for which some analysis will be disabled.
Define the EventLog Table
To set up the Workspace for loading more than one event log, you first need to define the EventLog table.
-
Open the mpmX Template App that you have already filled by following the steps in “Deploy the mpmX Template App”.
-
Open the script editor.
-
Create a new tab for the new process perspective.
-
Copy the content of tab "1C. Load EventLog" to the new tab.
-
Delete the parts of "SETTING CASE CONTEXT MASTER DIMENSIONS" from the new tab because it is only needed in the "main" event log.
-
Name the tab like the process perspective you will create, e.g. "1.D Load EventLog Users".
-
Drag the new tab after the tab "0. Init".
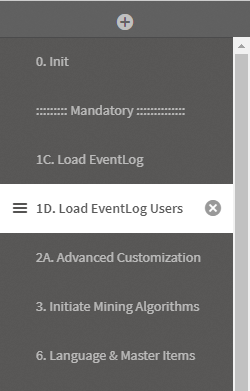
Example: Eventlog script tab with more than one EventLog -
-
Change the definition of the table EventLog according to the new process perspective you would like to create or load another EventLog here, as you have done before when preparing the mpmX Template App.
Example: User-Centric Analysis
We would like to create a user-centric analysis. Therefore, we change the definition of the fields ActivityType and ActivityTypeID from formerly "ActivityName" to "User". We do this by simply replacing "ActivityName" by "User" for the fields ActivityType, ActivityTypeID and in the where filter. For data modeling reasons, we decided to keep the "User" in an extra field "User" and the "ActivityName" in an extra field "ActivityName".
Do not load event information with the same fieldname in the two EventLogs. Notice that in the example we deleted the field RealUser because it would have created a circular reference or synthetic key.
Before: Activity-perspective
EventLog: //Log table name: "EventLog"

LOAD
//ProcessAnalyzer information

    CaseID,
     "ActivityName" as ActivityType,
     AutoNumber(ActivityName) + 100 as ActivityTypeID,
     Timestamp(ActivityStartTimestamp) as ActivityStartTimestamp,
     Timestamp(ActivityEndTimestamp) as ActivityEndTimestamp,
//Event information
//Here you can add other event-related information (dimensions and values)
    "UserName" as ActivityUserName,
    if(WildMatch("UserName", 'batch'), 0, 1) as RealUser //delete if no user available

FROM [$(DataConnection)/mpmXData.qvd] (qvd)
where len(ActivityName) > 1;
After: User-Perspective
EventLog: //Log table name: "EventLog"

LOAD
//ProcessAnalyzer information
     CaseID,
     "User" as ActivityType,
     AutoNumber("User") + 100 as ActivityTypeID,
     Timestamp(ActivityStartTimestamp) as ActivityStartTimestamp,
     Timestamp(ActivityEndTimestamp) as ActivityEndTimestamp,
//Event information
//Here you can add other event-related information (dimensions and values)
     "ActivityName" as ActivityName,
     "User" as User
FROM [$(DataConnection)/mpmXData.qvd] (qvd)
where len(UserName) > 1;
Define further sections & variables
Once the EventLog table is defined, there are other variables to define.
-
Fill in or delete the section where you define activity groups and custom lead times for the new process perspective.
infoPlease refer to Define Activity Groups for Hierarchical Mining on how to define activity groups or to Define Subprocesses in the mpmX EventLogGeneration Apps to on how to define custom lead times.
- If you use grouping or hierarchies, name the two tables uniquely. In our example we would name them "Groups_Users" and "Subprocesses_Users". Thus, you prevent inexpected behaviour like table concats.
-
Define or delete the variable "LET mvProcessFinished".
- If you are interested in deriving information on unfinished cases for this process perspective, then define it - otherwise delete it.
-
Go to the tab "3. Initiate Mining Algorithms" and copy the method call "mw_pa_initMining" below the EventLog you are loading.
- Replace the first parameter with the name of the process perspective you are creating.
- Adapt the third and the last parameter if you don't use grouping or custom lead times.
Example: Calling the mpmX-Algorithm
// :::::::::::::::::: CALLING THE mpmX-ALGORITHM ::::::::::::::::::::::: //

// Here the mpmX-Algorithm is called.

// Please insert four parameters as in the example below.

// First parameter: scenario name

// Second parameter: log table name

// Third parameter: Grouping table name (leave empty '' if no grouping table is provided)

// Fourth parameter: Data connection where you would like to save the (temporary) .qvd-files to

// EXAMPLE: call mv_pa_initMining ('ScenarioName','EventLogTableName','GroupingTableName','FolderName', 'StoreQVDs');

//                                  1st parameter , 2nd parameter ,     3rd parameter,   4th parameter, 5th parameter

call mw_pa_initMining('Users','EventLog','','$(DataConnection)','$(mvStorempmXModelQVD)','');
Qualify the mpmX Data Model
This is necessary to avoid circular references or synthetic keys and to concatenate the second mpmX Data Model with the central process perspective.
-
Call the mpmX qualify method for each table of the mpmX Data Model that you would like to keep.
In the example we will keep the pa_activity_log, the pa_process_variants and the AL_ActivityTypes.
noteThe three tables are the minimum for functional usage of the mpmX extensions.
Here are the steps to call the qualify method:
-
Call the qualify method after the method mw_pa_initMining.
-
Enter the table name (which ends with the first parameter you put into mw_pa_initMining).
-
Enter the first parameter you put into "mw_pa_initMining" again as qualifier.
Example: Qualifiers
call MW_qualify_FieldNames ('pa_activity_log_Users', 'Users');

call MW_qualify_FieldNames ('pa_process_variants_Users', 'Users');

call MW_qualify_FieldNames ('AL_ActivityTypes_Users', 'Users'); -
-
Restore the keys
- By qualifying the logs, you have lost the keys between the tables pa_acitivity_log and pa_process_variant.
- To restore them, do this:
rename field Users_Users_ProcessPathUniqueNo to Users_ProcessPathUniqueNo; -
Create a key between the two process perspectives - the CaseID in our example.
Example: Create a Key between the process perspectives
left join (pa_activity_log_Users)
load Users_CaseID, Users_CaseID as CaseID
resident pa_activity_log_Users; -
Qualify the tables for ActivityGroups and Subprocesses if you have defined them previously.
Final Steps
-
Drop all tables that you have not qualified.
- In our example, we will need to drop the tables CaseTimes and EventTimes.
-
Fill the rest of the mpmX Template App script if you have not done it so far.
- This is described in Deploy the mpmX Template App
-
Click "reload data".
- Your data model should be similar to our example:
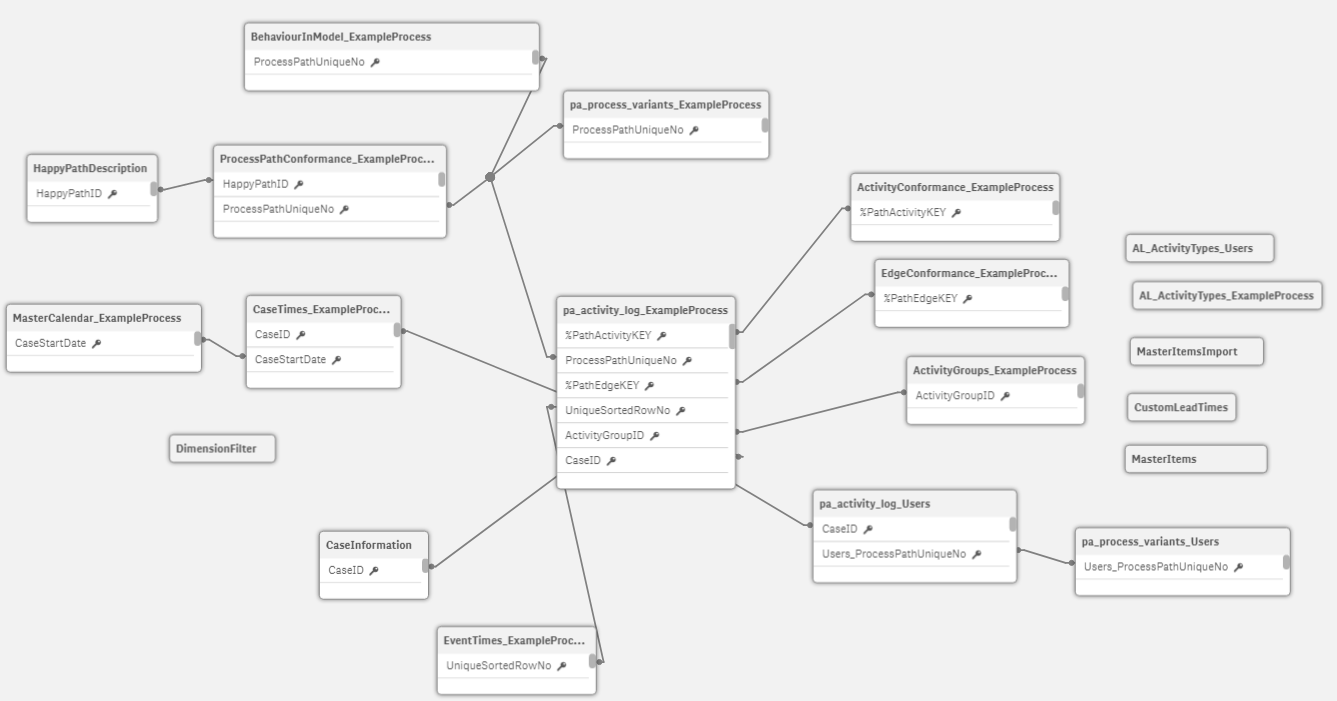
Example of a DataModel with Several Logs