Machine Learning und AI Configuration
The mpmX platform offers numerous options for making predictions:
- Connection to Python
- Connection to existing ML platforms
- OpenAI Connector
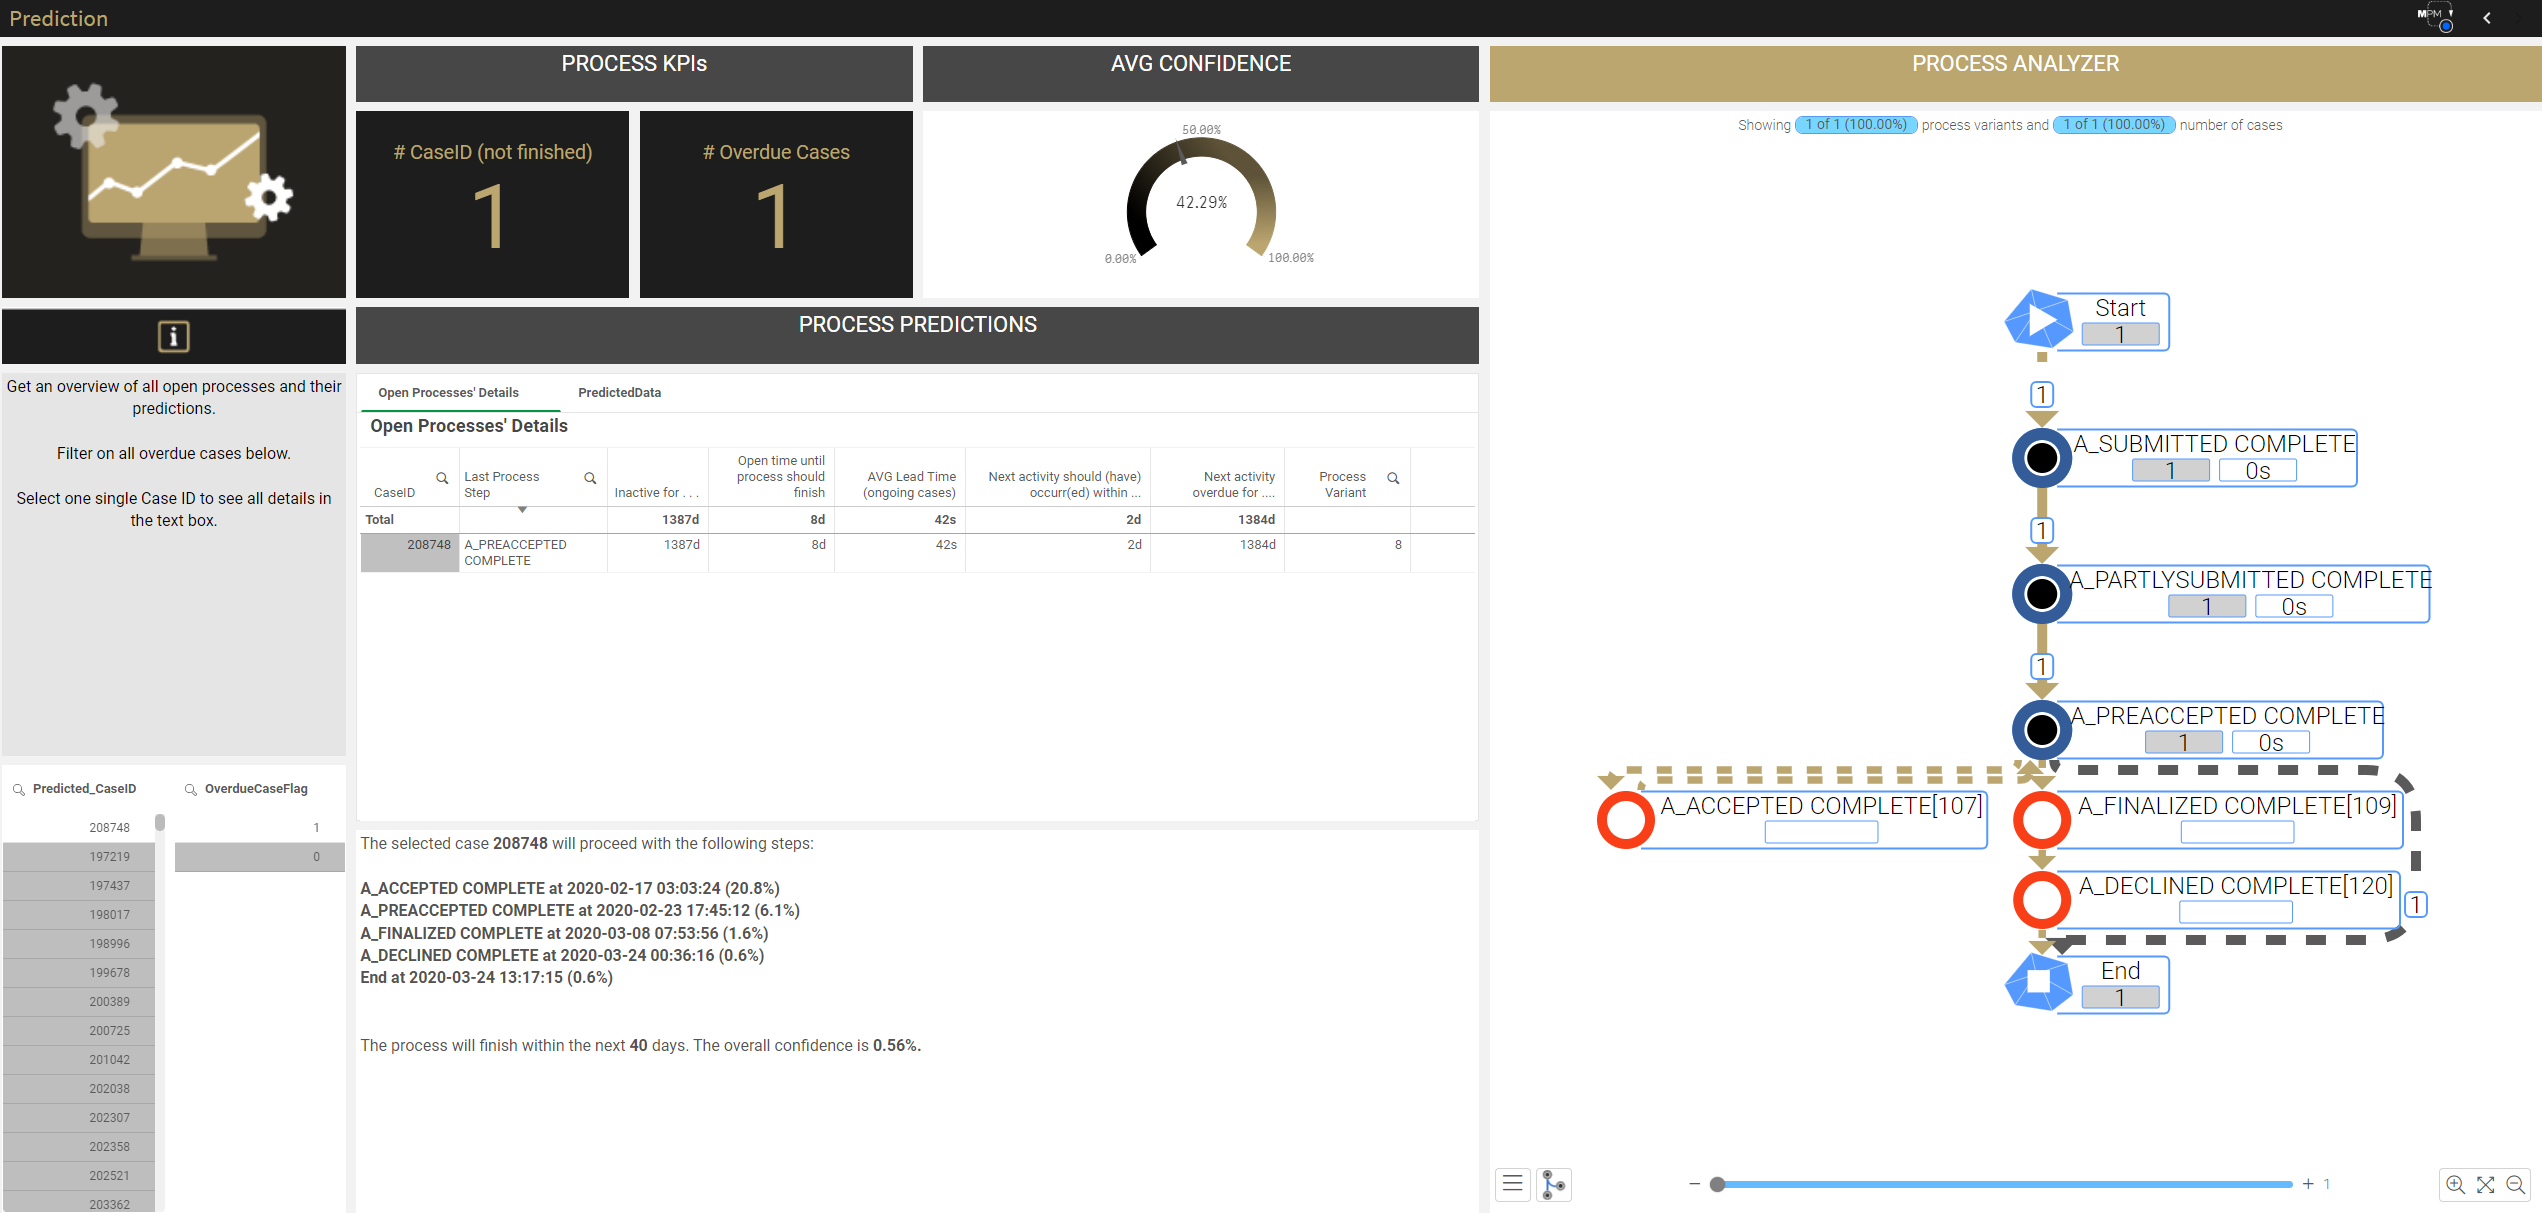
Predictions for open processes can be calculated using a machine learning model that is integrated into mpmX. When selecting a case that has not been completed, the most likely subsequent steps, including the expected time, are calculated based on context data or previous process steps. Which parameters are taken into account for the prediction of the next process steps can be individually preconfigured.
This is a module that is not included as standard. Please get in touch with your contact at mpmX for more detailed information.
Example: Connection to Python
This enables perfect interaction with the data scientists in your organization. Existing libraries can be reused to train a wide variety of ML models and use them for predictions.
- Step 1: Connection to Python with the help of an SSE
- Step 2: Importing the mpmX Python scripts (e.g. with neural network for process prediction - prediction of the next activities of an open case and the time until these occur)
- Step 3: Importing the mpmX Analytics scripts with which the data is transferred to Python
- Step 4: Importing the prediction dashboards from mpmX
Connection to existing ML platforms
Connection of existing ML platforms such as DataRobot, Azure ML and co via the connectors provided in order to integrate into the existing ML landscape.
OpenAI Connector
Here you will learn how to work with the OpenAI Analytics connector to extend your Qlik Sense apps with contextual depth from generative AI models. In particular, you will learn how to use the connector with two different configurations.
You can integrate your OpenAI Analytics connection directly into your data model so that the data it generates is already loaded into the app. Alternatively, you can use it in chart expressions. Below see how to set yourself up to work with the connector and how to create connections with two different configurations. You will then be guided through basic examples of how to integrate the functionality into your Qlik Sense applications.
The examples in this tutorial can also be used to work with the Azure OpenAI Analytics Connector.
Setting up your OpenAI platform account and your cloud environment
Before you can start working with the OpenAI Analytics Connector, you need to complete several steps. These include:
- Creating an OpenAI platform account
- Obtaining an OpenAI API key
- Enabling the analytics connector functionality in Qlik Cloud
For full details, see Getting started with the OpenAI platform.
Create the connections
Create connections to the OpenAI Analytics Connector via the hub or the data editor. Once you have created the connections, you can work directly with the OpenAI platform via the load script or in diagram objects.
Proceed as follows:
-
Create a new connection with OpenAI via the data editor or via the hub. In the data editor, you will find the OpenAI connector under Analysis sources.
-
Select the configuration to be used. Use one configuration for each connection created. For this tutorial, create separate connections for each of the following examples:
- Example 1: OpenAI Completions API (GPT-3) - Rows
- Example 2: OpenAI Completions API (GPT-3) - JSON Tables
- Example 3: OpenAI Chat Completions API (GPT-3.5, GPT-4) - Rows
- Interactive example: OpenAI Chat Completions API (GPT-3.5, GPT-4) - Rows
-
Authenticate yourself during the connection by entering the OpenAI API key that you created in the preparation section of this tutorial.
-
Customize the default parameter values to your needs.
-
Add a link field to link the connection output to the data model of one of your apps. This depends on the examples you are working on.
- Enter RowId for the connections used in examples 1 to 3.
- Leave this parameter blank for the interactive example.
-
For the Name parameter, enter a unique name value for each connection created and specify the configuration used by the connection. You will need these parameter values when working in the load script or with diagram formulas. Use the following for the tutorial examples:
- Example 1: OpenAI Connection for Rows Completions (GPT-3)
- Example 2: OpenAI Connection for JSON Tables Completions (GPT-3)
- Example 3: Chat_Completions_GPT_3.5_4_Rows
- Interactive example: Interactive_Chat_Completions_GPT_3.5_4_Rows
-
Click on Create.
